Blog

  • How to Prep for a Concrete Pour in Idaho: The Week Before Matters More Than the Day Of

    How to Prep for a Concrete Pour in Idaho: The Week Before Matters More Than the Day Of

    Knowing how to prep for a concrete pour in Idaho is most of the job. The truck shows up, eight yards go down, and four hours later it looks finished. What decides whether that slab is still tight in thirty years happened in the week before the truck ever rolled.

    I run Skinner Customs out of Rigby, and I pour flatwork and foundations across Jefferson, Bonneville, and Madison counties. This is what actually goes into prep, what I need from you as the homeowner, and where I see people lose the most money.

    Start with drainage, not concrete

    Before anything else, figure out where water goes. Our soils around Rigby and Shelley hold water in spring, and a slab that sits in a low spot will move.

    Concrete should slope away from the house. A quarter inch of fall per foot is the working number for a patio or a driveway apron. On a 20-foot driveway that is five inches of drop, and you have to plan for it in the grading, not discover it after the forms are set.

    Walk the area after a heavy rain or during spring melt. If water stands there now, it will stand on your new slab. That gets fixed with grading, a French drain, or a different location — but it gets fixed first.

    Locate utilities before anything gets dug

    Call 811 before any digging. In Idaho that is Dig Line, and the locate is free. Idaho requires notice at least two business days before excavation, so it goes on the calendar early rather than the morning we want to dig.

    811 marks public utilities up to the meter. It does not mark private lines you or a previous owner ran: sprinkler mainlines, landscape lighting, gas to a shop or a fire pit, a well line, a septic lateral. If you know where those are, mark them or tell me. If you do not, we probe.

    Cutting a sprinkler line is a nuisance. Cutting a gas line is a very different day.

    The base is where the slab is won or lost

    Here is where the corners get cut on cheap bids, and here is where the failures come from.

    Strip the organics. Sod, topsoil, roots, and old fill all have to come out. Organic material decomposes and compresses, and the slab settles into the void.

    Compacted gravel base, four inches minimum. On soft or questionable soil, more, placed in lifts and compacted each lift. One deep dump of gravel run over once with a plate compactor is not compaction. It has to be built up in layers.

    Uniform support. A slab spanning a soft pocket next to a hard pocket cracks over the transition. Uniform matters more than hard.

    NRMCA’s guidance on slab support (CIP 29, Vapor Retarders Under Slabs on Grade) calls for a uniformly compacted subgrade with a well-draining, stable base material, and specifically warns off clay and organics in that layer. It also covers where a capillary break belongs and how a vapor retarder gets lapped and sealed.

    Vapor retarder where it belongs. Under a heated interior slab, or anything getting a moisture-sensitive floor covering later, you want a vapor retarder — 10 mils minimum, seams lapped six inches and sealed. On an outdoor patio or a driveway it is not needed.

    If a bid does not tell you how deep the base is and how it gets compacted, that is the number to ask about.

    Forms, grade, and the shape of the finished slab

    Forms set the elevation, the edges, and the fall. They get staked solid, because eight yards of wet concrete pushes hard, and a form that bows leaves a wave you live with permanently.

    Thickness gets set here too. Four inches is standard flatwork for patios and walks. Driveways and anything taking a truck or a trailer go thicker. Adding an inch adds cost across the whole pour, so it is decided before the forms go in, not the morning of.

    Expansion joint material goes in wherever the new slab meets the house, an existing slab, a garage floor, or a post footing. Concrete moves with temperature, and in our climate it moves a lot. It needs somewhere to do that besides against your foundation.

    Rebar, and why I will not use wire mesh

    Every slab we pour gets rebar. Number three or number four, on an eighteen-inch grid, chaired up so it sits in the middle third of the slab.

    Wire mesh is the shortcut. It gets rolled out, it gets walked on during the pour, and it ends up lying on the base doing nothing. Once it is on the bottom it is not holding anything together. Rebar tied and chaired stays where it is supposed to be.

    Rebar does not stop concrete from cracking. Nothing does. What it does is hold the crack tight so it stays a hairline instead of opening into two pieces at different elevations.

    What I need from you before pour day

    Access. A concrete truck is roughly 70,000 pounds loaded. It needs a route in and room to turn. Move vehicles, trailers, and boats the night before. If access is tight, we talk about a pump, and that is decided in advance.

    Water and power. A spigot and an outlet within reach.

    Gates and pets. Gates unlocked or open, dogs inside. Fresh concrete and a curious dog go together badly.

    Overhead clearance. Low branches and power lines over the pour area get sorted out before the truck arrives, not while it is idling.

    Decisions made. Finish, color, saw cut layout, where a future hot tub or post might land. Changing your mind at 7 a.m. on pour day costs real money.

    Timing it for our climate

    Concrete is a chemical reaction, and temperature drives it.

    Spring and fall are the best pouring windows in Eastern Idaho. Mid-summer afternoons set fast and need earlier starts and attention to curing. Once nights run below freezing, the pour needs protection, which is a real line item and a real conversation.

    Plan on the schedule sliding. Weather moves pours. A contractor who promises an exact date three weeks out in October is telling you what you want to hear.

    The day after matters too

    Curing is not “letting it dry.” Concrete gains strength by hydrating, and that needs moisture and temperature.

    Keep off it. Foot traffic after a day or so, vehicles at a week minimum, and longer if it has been cold. Keep sprinklers from blasting it. Do not park a trailer on it in week one.

    And keep deicers off it the first winter entirely. New concrete has not built its resistance yet, and salt on a first-winter slab is the fastest way to ruin a good pour.

    Frequently asked questions

    How long does prep take before a concrete pour? For a typical residential driveway or patio, plan on one to three days of prep work, plus the Dig Line locate window before any digging starts. Bigger or wetter sites take longer.

    Do I need to call 811 before a concrete pour in Idaho? Yes. Notify Dig Line at least two business days before excavation. The locate is free, and it covers utility-owned lines only — private lines you or a previous owner installed are not marked, so mark those yourself.

    How thick should the gravel base be under a concrete slab? Four inches of compacted gravel minimum, placed and compacted in lifts. Soft or wet soils need more.

    Can you pour concrete over grass or topsoil? No. Organics have to be stripped out. They decompose and compress, and the slab settles into the void.

    How long before I can drive on new concrete? A week is the working minimum for a passenger vehicle, longer in cold weather. Heavy trucks and trailers should wait longer than that.

    Want a straight answer on your site?

    Send photos of the area, rough dimensions, and what you want to put on it, and I will tell you what the prep actually involves there — including if the honest answer is that drainage has to get fixed first.

    Need concrete work in Eastern Idaho? Call Zach at Skinner Customs at (208) 390-5794 or start at skinner-customs.com.


    Content produced in partnership with S4 Media, marketing partner of SwagerBuilds LLC.
  • The Real Cost of Decorative Concrete in Eastern Idaho (2026): Sticker Price vs. Ten-Year Cost

    The Real Cost of Decorative Concrete in Eastern Idaho (2026): Sticker Price vs. Ten-Year Cost

    Decorative concrete in Eastern Idaho runs $10 to $22 per square foot installed in 2026, against $8 to $13 for the same slab in plain broom finish. But the number on the bid is only part of what decorative concrete costs you. The rest shows up over the next ten years, in sealer, and almost nobody puts that on the quote.

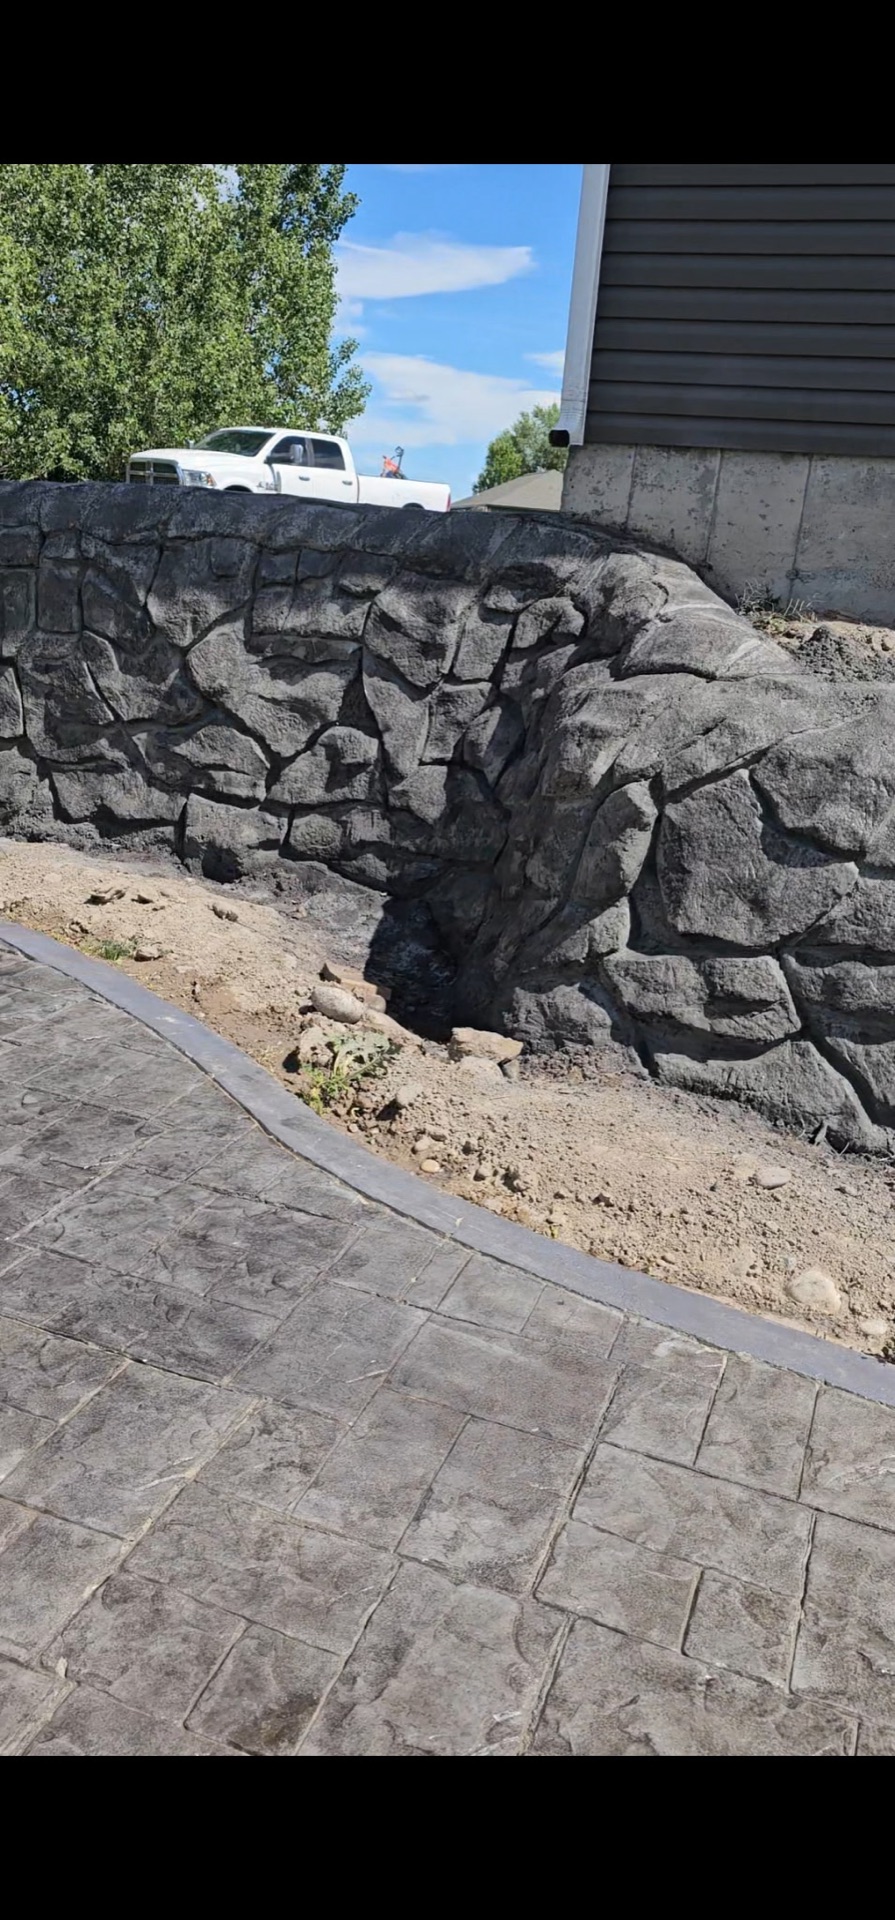
    I run Skinner Customs out of Rigby, and I pour decorative work every season — stamped patios, colored drives, exposed aggregate, stamped rock-face walls. I am not talking anybody out of it. I am telling you what it actually costs to own, because the homeowners who end up disappointed are the ones who bought the install and never priced the upkeep.

    What each option costs up front

    Finish 2026 installed cost What you are paying for
    Plain broom finish $8 – $13 per sq ft Baseline: 4,000 PSI, rebar, compacted base
    Integral color (added to any base) +$1.50 – $3 per sq ft Pigment batched at the plant, color through the slab
    Color hardener (added to any base) +$2 – $4 per sq ft Dry pigment broadcast and floated in, richest color, harder surface
    Acid or water-based stain +$2 – $5 per sq ft Applied after cure, variegated look, surface-only
    Exposed aggregate $12 – $17 per sq ft Washed surface, grippy, hides staining well
    Stamped $14 – $22 per sq ft Pattern, release color, texture mats, hand detail, sealer
    Mow strip or decorative curb $12 – $22 per linear foot Formed landscape edging

    A release color for the secondary tone on stamped work adds $0.75 to $1.50 per square foot. On a 320-square-foot patio — 16 x 20, the size most people land on — plain broom is $2,560 to $4,160 and stamped is $4,480 to $7,040. Call the premium roughly $1,900 to $2,900.

    The ten-year number nobody quotes

    Stamped concrete needs sealer. That is not a maintenance upsell, it is how the product works: the color lives in a thin surface layer and the sealer is what keeps it there and keeps the pattern from going chalky.

    In our climate, plan on resealing stamped work every two to three years at roughly $0.75 to $1.50 per square foot. On that same 320-square-foot patio, that is $240 to $480 each time, three to five times over ten years — about $720 to $2,400.

    Plain broom-finish concrete benefits from sealing too, but the schedule is more forgiving, typically every three to five years, and nothing about its appearance depends on it.

    So the honest ten-year comparison on a 320-square-foot patio looks like this:

    Plain broom finish Stamped
    Install $2,560 – $4,160 $4,480 – $7,040
    Sealer over 10 years modest, optional $720 – $2,400
    Ten-year total $2,560 – $4,900 $5,200 – $9,440

    Integral color sits in between and is the best value in the lineup for most people: the pigment runs through the whole slab, so when the surface wears there is more of the same color underneath, and it does not create a maintenance obligation to keep looking right.

    What our climate does to decorative work

    Three Eastern Idaho realities change which decorative option I recommend:

    Freeze-thaw. We cycle above and below freezing dozens of times a winter. Water gets into the surface, freezes, expands, and pops off whatever is on top. Anything that lives only at the surface — stain, a thin overlay, a film-forming sealer applied too heavily — is more exposed to that than pigment mixed into the concrete.

    Snow removal. A shovel blade, and especially a plow or a snowblower skid, rides on the high points of a stamped pattern. Deep, heavily textured patterns in a driveway or a walk you clear all winter will show wear at the pattern peaks. On a patio you shovel twice a year, it is a non-issue.

    Deicing salt. Calcium chloride and sodium chloride are acceptable on concrete. Ammonium-based and magnesium-based products chemically attack the surface, and they will take a decorative finish apart faster than anything else on this list. On decorative concrete I would rather you use sand.

    That leads to a simple rule I give people: put the heavy decorative work where you live and look — patios, front entries, courtyards, pool decks — and keep the surfaces you plow and salt simpler. Integral color in a broom finish on a driveway gives you most of the visual upgrade with none of the maintenance debt.

    Where the money actually goes

    Decorative work is not marked-up plain concrete. The base slab underneath is identical: 4 inches for a patio, 4,000 PSI mix, #3 or #4 rebar on an 18-inch grid, minimum 4 inches of compacted gravel. Wire mesh is the low-bid shortcut, decorative or not — it gets walked to the bottom of the pour and does nothing.

    What is added on top of that is labor and timing. Stamping is done in a window measured in minutes, on the whole pour, by enough hands to finish it before the slab sets. That means a bigger crew on the job, mats and release material staged in advance, and no ability to stop and come back tomorrow. Miss the window and you own the result permanently.

    That is the real reason to care who pours decorative concrete, and why a suspiciously cheap decorative bid is a bad bet. Our flatwork floor is $8 per square foot for plain broom finish. Stamped work carries genuine added labor and material above that, so a stamped bid well under $12 in this market means something got cut — usually base, reinforcement, or the sealer step that the finish depends on.

    The Decorative Concrete Council of the American Society of Concrete Contractors publishes technical guidance and certification for exactly this kind of work, and it is a reasonable reference point when you are comparing contractors rather than comparing prices.

    Questions to ask before you sign a decorative bid

    1. What is the slab spec underneath — thickness, PSI, reinforcement, base depth?
    2. Is sealer included in the install, and what product?
    3. What is the resealing interval and the cost per square foot when it comes due?
    4. Is the color integral, a hardener, a release color, or a stain — and which parts of the look depend on the surface layer only?
    5. How many people will be on site the day of the pour?
    6. Where are the joints going, and how will they be detailed in the pattern?
    7. What does the finish look like in three years in this climate — and can you show me one of yours that old?

    That last one is the whole test. Anybody can show you a stamped patio the week it was sealed.

    Frequently asked questions

    How much does decorative concrete cost in Eastern Idaho?

    $10 to $22 per square foot installed in 2026, depending on the finish. Integral color is the cheapest upgrade at $1.50 to $3 per square foot over a plain pour; stamped work is the most expensive at $14 to $22 per square foot.

    Is stamped concrete worth it?

    On a patio or entry you look at and sit on, often yes. On a driveway you plow and salt all winter, I usually recommend integral color in a broom finish instead — most of the look, none of the resealing schedule.

    How often does stamped concrete need to be resealed in Idaho?

    Every two to three years in our freeze-thaw climate, at roughly $0.75 to $1.50 per square foot. Skip it and the color fades and the surface dulls.

    Which decorative finish holds up best to snow removal?

    Integral color in a broom finish, then exposed aggregate. Deep stamped textures wear at the pattern peaks where a shovel or plow blade rides.

    Does decorative concrete crack more than plain concrete?

    No. It is the same slab with a different surface. Cracking is a function of base, reinforcement, thickness, and jointing — not the finish. What changes is that a crack is more visible in a pattern than in a broom finish.

    Can you add color or a stamped finish to concrete I already have?

    Stamping, no — that happens while the concrete is plastic. Staining or an overlay on an existing sound slab is sometimes possible, but it depends on the condition of the surface, and in this climate an overlay on an exterior slab has to be chosen carefully. If the slab is failing, replacing it with color or stamping built in is the longer-lasting answer.

    Get a decorative number

    Tell me what the area is, what you want it to look like, and whether it is something you will shovel in January or look at from the kitchen window. I will price it both ways — decorative and plain with integral color — so you can see the real gap before you decide.

    Need concrete work in Eastern Idaho? Call Zach at Skinner Customs at (208) 390-5794 or start at skinner-customs.com.


    Content produced in partnership with S4 Media, marketing partner of SwagerBuilds LLC.
  • Cost to Replace a Concrete Driveway in 2026 (Eastern Idaho Numbers)

    Cost to Replace a Concrete Driveway in 2026 (Eastern Idaho Numbers)

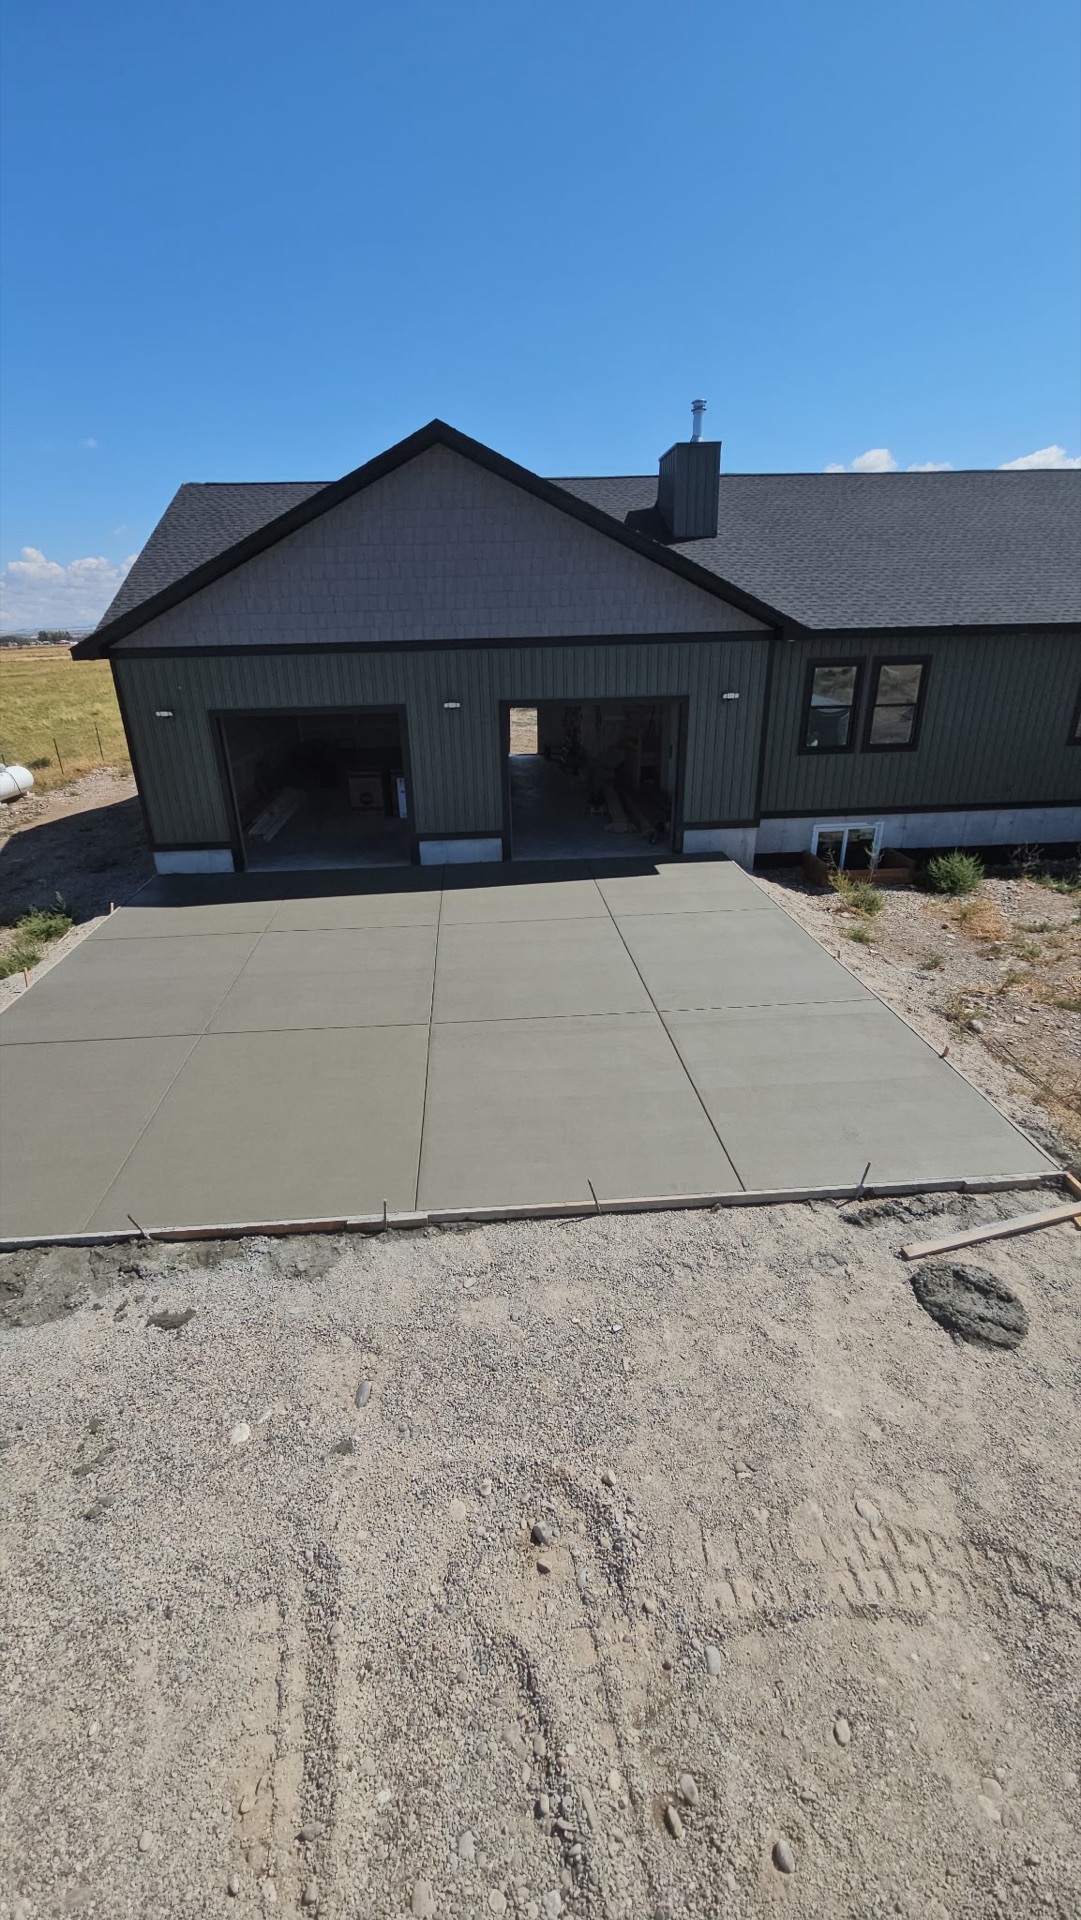
    The cost to replace a concrete driveway in Eastern Idaho runs $10 to $17 per square foot in 2026 with the old slab removed and hauled. On a standard 20 x 60 two-car drive — 1,200 square feet — that is $12,000 to $20,400. Tear-out is $2 to $4 per square foot of that; the new pour is $8 to $13.

    I run Skinner Customs out of Rigby, and replacement drives are a bigger share of our flatwork every year, because a lot of concrete poured in Rigby, Idaho Falls, Ammon, and Rexburg in the 1990s and early 2000s is now 25 to 30 winters old. Before you spend that money, it is worth knowing whether you actually need to, and why the first one failed — because if you replace the slab without fixing the reason, you buy the same problem again.

    Replacement cost by driveway size

    Driveway size Square footage Replacement installed
    One-car (12 x 30) 360 sq ft $3,600 – $6,120
    Two-car (20 x 30) 600 sq ft $6,000 – $10,200
    Two-car standard (20 x 60) 1,200 sq ft $12,000 – $20,400
    Three-car with apron (30 x 60) 1,800 sq ft $18,000 – $30,600
    Long rural drive (12 x 200) 2,400 sq ft $24,000 – $40,800

    What moves you inside that range:

    • Thickness. Standard residential is 4 inches. Every extra inch is about $1.50 to $2.50 per square foot. If you park a diesel, a fifth wheel, or a boat trailer, price 5 or 6 inches now.
    • How much rebar is in the old slab. A mesh-and-gravel driveway from 1998 breaks out fast. A properly reinforced slab takes longer and costs more to remove.
    • Access. If a dump trailer and a ready-mix truck can both get to the work, removal is cheap. Backyard slabs, narrow side yards, and gated drives cost more because the material moves by machine in small bites or by hand.
    • Grade and drainage work. If the reason the old drive failed was water, fixing it is part of the job, not an upsell.
    • Decorative finish. Integral color adds $1.50 to $3 per square foot. Stamped work runs $14 to $22 installed.

    Repair or replace: how to tell

    Not every bad-looking driveway needs to come out. Here is how I sort it on a walk-through.

    Replace it when:

    • Panels have settled or heaved enough to create a lip you can catch a toe or a snowplow blade on
    • The surface is scaling or spalling over most of its area — flaking off in layers, exposing aggregate
    • Cracks are wide (over about a quarter inch), numerous, and have vertical offset between the two sides
    • The slab is cracked into pieces smaller than about 3 feet across, which means it has lost its structure
    • It is under 4 inches thick and you need it to carry more than it was built for

    Repair or resurface it when:

    • Cracks are narrow, stable, and mostly at or near the joints
    • One or two panels are bad and the rest is sound — those panels can be cut out and replaced
    • The surface is sound but stained or dull
    • A single corner has settled, which a slab-jacking outfit can sometimes lift back for far less than replacement

    The honest version: a driveway with a handful of tight cracks and no offset has years left. A driveway that flakes under a shovel or rocks when you drive on it does not.

    Why the old one failed

    This is the part most replacement bids skip, and it is the part that decides whether the new slab lasts 30 years or 10.

    Surface scaling — the flaking that turns a smooth drive into a rough, pitted one — is the most common failure I see in this climate, and it is almost never bad luck. The National Ready Mixed Concrete Association’s bulletin CIP 2, Scaling Concrete Surfaces, lists the causes plainly: too little entrained air, concrete without enough strength to resist water penetration, deicing chemicals applied too early, poor finishing, and insufficient curing. For freeze-thaw exposure with deicers, it specifies 4,000 psi concrete and about 6 percent total air content for common aggregate sizes.

    That matches what we dig out. The failed drives around here were usually poured thin, on light or uncompacted base, with a low-strength mix, salted their first winter, and never cured properly. Any one of those alone is survivable. Three together is a 15-year driveway.

    The structural failures — settlement, heaving, cracking into pieces — are almost always base and water. Topsoil never stripped, fill never compacted in lifts, an irrigation line running under the slab, or a downspout dumping at the edge of the concrete.

    What a replacement should include

    If you are spending five figures on the same square footage twice, the second one gets built right:

    • Strip and rebuild the base. Old gravel that has been sitting under a failed slab for 25 years gets reworked and recompacted, not just leveled. Minimum 4 inches of compacted gravel, in lifts, deeper on soft or irrigated ground.
    • 4,000 PSI air-entrained mix. Non-negotiable in a freeze-thaw climate, and it is what the NRMCA guidance above calls for.
    • #3 or #4 rebar on an 18-inch grid. Every slab, every time. Wire mesh is the low-bid shortcut. It is supposed to sit mid-slab and it ends up walked to the bottom during the pour, which means it does nothing.
    • Joints laid out before the pour, not after. Contraction joints cut to at least a quarter of the slab depth, panels kept close to square, isolation joints where the drive meets the garage slab, the walk, and the apron.
    • Drainage fixed. Slope away from the garage and the house. If the old drive pooled, the new one gets regraded, not repoured at the same elevation.
    • Real curing. A curing compound or wet cover, and no deicers the first winter. Sand for traction instead.

    Our flatwork pricing starts at $8 per square foot for a plain pour, and a replacement runs above that because tear-out and haul-off are real costs. A replacement quoted at the price of a new pour on bare ground means the tear-out is coming out of something else — usually the base or the reinforcement.

    Timing a replacement in Eastern Idaho

    Spring through fall is the window. Two practical notes for this area:

    You lose the driveway for about a week. Tear-out and base work are a day or two, the pour is a day, and you stay off it for a week with vehicles — longer for anything heavy. Plan parking before we start.

    Fall pours are fine, and often our best-quality work, as long as the slab has time to gain strength before hard freezes and before salt lands on it. What I will not do is pour a driveway in November and hand you a slab that gets deiced at three weeks old. That is how the last one started failing.

    Frequently asked questions

    How much does it cost to replace a concrete driveway in 2026?

    In Eastern Idaho, $10 to $17 per square foot with removal included. A 1,200-square-foot two-car drive is $12,000 to $20,400 depending on thickness, access, and site work.

    How much of that is tear-out?

    Removal and haul-off is $2 to $4 per square foot, depending on slab thickness, reinforcement, and access.

    Can I pour new concrete over an old driveway instead?

    Sometimes, but only if the existing slab is structurally sound and the added height does not create a problem at the garage door or the street. If the old slab is cracked into pieces or heaving, an overlay just cracks along with it.

    How long does a concrete driveway last in Idaho?

    Built right — 4,000 PSI air-entrained mix, rebar, compacted base, proper curing, no early salt — 30 years or more. Built thin on bad base and salted young, 10 to 15.

    Is it worth replacing just the bad panels?

    Often, yes. If the rest of the slab is sound, cutting out and replacing individual panels costs a fraction of a full replacement. Expect a visible color difference between new and weathered concrete.

    What deicer is safe on a new driveway?

    None for the first winter. After that, calcium chloride and sodium chloride are acceptable on concrete. Never use ammonium-based or magnesium-based products, which chemically attack the surface.

    Get a replacement number

    Send photos of the driveway — the whole run plus close-ups of the worst areas — the approximate dimensions, and a note on where trucks can get in. I will tell you whether it needs replacing, whether partial panel replacement gets you there for less, and what the real number is.

    Need concrete work in Eastern Idaho? Call Zach at Skinner Customs at (208) 390-5794 or start at skinner-customs.com.


    Content produced in partnership with S4 Media, marketing partner of SwagerBuilds LLC.

  • Stamped vs Regular Concrete Cost: The Real Difference on an Eastern Idaho Patio (2026)

    Stamped vs Regular Concrete Cost: The Real Difference on an Eastern Idaho Patio (2026)

    The stamped vs regular concrete cost question has a simple answer and a more useful one. The simple answer: in Eastern Idaho in 2026, a regular broom-finish slab runs $8 to $13 per square foot installed, and stamped concrete runs $14 to $22. The more useful answer is what that gap looks like on your actual patio, what you keep paying for after the pour, and where stamped earns its money versus where it is just a bigger check.

    I run Skinner Customs out of Rigby. We pour both every week, and I would rather tell you where plain concrete is the right call than sell you a pattern you will not care about in five years.

    Side-by-side cost on real patio sizes

    Patio size Square feet Regular (broom finish) Stamped Stamped premium
    12 x 16 192 $1,536 – $2,496 $2,690 – $4,220 about $1,150 – $1,725
    16 x 20 320 $2,560 – $4,160 $4,480 – $7,040 about $1,920 – $2,880
    20 x 24 480 $3,840 – $6,240 $6,720 – $10,560 about $2,880 – $4,320

    The 16 x 20 is where most people land. On that size, stamped costs roughly $2,000 to $3,000 more than a plain slab poured to the same spec.

    Color adds to the stamped number. Integral color mixed at the plant adds $1.50 to $3 per square foot, and a release color for the secondary tone adds $0.75 to $1.50. We broke those options down further in our stamped patio cost guide for Idaho Falls.

    The slab underneath is the same

    This is the part people miss. Stamped and regular concrete should be the same slab. The difference is what happens to the top in the first couple of hours.

    Every patio we pour, stamped or not, gets:

    • 4,000 PSI mix, which is the minimum for our freeze-thaw cycles
    • #3 or #4 rebar on an 18-inch grid, never wire mesh
    • A compacted gravel base, 4 inches minimum, in lifts on soft ground
    • Control joints laid out so cracks happen where they are supposed to

    If a stamped bid comes in cheap, that savings usually came out of this list, not out of the stamping. A cracked plain slab is an eyesore. A cracked stamped slab is worse, because there is no invisible patch for a decorative surface.

    Where the extra money goes

    Stamping is not just rolling a texture on. The crew has to hit a narrow window: too early and the mats sink and smear, too late and the pattern will not take. On a hot September afternoon in the valley, that window can be short, so a stamped pour needs more hands on site at the same moment.

    On top of labor, you are paying for:

    • Color. Integral pigment in the mix and release agent on the surface.
    • Mats and tools. Pattern mats, texture skins, and hand tools for edges and steps.
    • Detail work. Borders, steps, and transitions all get hand-textured.
    • Sealer. Stamped concrete needs it. That is part of how the product works, not an upsell.

    The ACI Guide to Decorative Concrete from the American Concrete Institute covers the materials and methods behind stamped and colored work, and it is a good reference if you want to understand what a bid should include.

    What each one costs to own

    The install price is not the whole comparison.

    Stamped concrete needs resealing every two to three years in our climate, at roughly $0.75 to $1.50 per square foot. On a 320 square foot patio, that is $240 to $480 each time. Over ten years, plan on three to five reseals, or about $720 to $2,400. Skip it, and the color fades, the surface takes on water, and freeze-thaw starts working on it.

    Regular broom-finish concrete benefits from sealing too, especially at the joints, but the schedule is more forgiving. Every three to five years is typical. If you want real numbers on that, see our concrete sealing cost breakdown.

    Repairs are where stamped really costs more. A crack or a chipped edge on a broom finish can be filled and blended well enough. On stamped concrete, matching pattern, color, and sheen after the fact is hard, and it rarely disappears.

    Practical differences you will notice

    Traction. A broom finish is naturally grippy. Stamped concrete with a glossy sealer gets slick when it is wet, and around a hot tub or a back door in January that matters. Ask for an anti-slip additive in the sealer.

    Snow and ice. Both surfaces handle shoveling fine. Both take damage from harsh deicers. On stamped work, salt also attacks the sealer and the color, so sand for traction is the safer bet.

    Heat. Darker stamped colors get hot in direct July sun. If the patio faces west with no cover, lean toward lighter tones.

    When stamped is worth it, and when it isn’t

    Stamped makes sense for:

    • The main backyard patio where you actually sit and entertain
    • A front entry or walkway that sets the look of the house
    • Areas next to stone, outdoor kitchens, or features where plain concrete looks unfinished

    Regular concrete makes sense for:

    • Side yards, trash-can pads, and work areas
    • Hot tub pads and anything that will be covered
    • Driveways and shop aprons that take wheel loads and salt
    • Tight budgets where the money is better spent on size or thickness

    The middle ground is often the best value: stamp the part people see, and broom-finish the rest. A stamped patio with plain walkways, or a broom-finish slab with a stamped border, gets you most of the look for a lot less.

    Ten-year math on a 16 x 20 patio

    Put install and upkeep together and the comparison gets clearer:

    • Stamped: $4,480 to $7,040 to install, plus $720 to $2,400 in resealing over ten years. Call it $5,200 to $9,440 all in.
    • Regular: $2,560 to $4,160 to install, plus periodic sealing on a looser schedule.

    That is the real number to weigh against how much the look matters to you.

    If you want some of the look without the pattern, integral color in a broom-finish slab is another option. It adds the same $1.50 to $3 per square foot as it does on stamped work, skips the stamping labor, and keeps the simpler sealing schedule of a plain slab. It will not read as stone, but it takes the gray edge off a big backyard slab.

    Frequently asked questions

    How much more does stamped concrete cost than regular concrete? In Eastern Idaho in 2026, stamped runs $14 to $22 per sq ft versus $8 to $13 for broom finish. On a 16 x 20 patio, stamped costs roughly $2,000 to $3,000 more.

    Is stamped concrete as strong as regular concrete? It should be identical underneath. Same mix, same reinforcement, same base. The stamping only changes the surface.

    Does stamped concrete crack more than regular concrete? No, but cracks are more noticeable and harder to repair invisibly. Proper base prep, rebar, and control joints matter even more on stamped work.

    How often does stamped concrete need to be sealed? Every two to three years in our climate, at about $0.75 to $1.50 per sq ft.

    Is stamped concrete slippery? It can be when wet, especially with a glossy sealer. An anti-slip additive in the sealer helps a lot.

    Get both numbers before you decide

    Send the patio size, a couple of photos of the area, and whether you are leaning toward a pattern, and I will price it both ways so you can see the real difference.

    Need concrete work in Eastern Idaho? Call Zach at Skinner Customs at (208) 390-5794 or start at skinner-customs.com.


    Content produced in partnership with S4 Media, marketing partner of SwagerBuilds LLC.

  • Pole Barn Concrete Slab Cost in Eastern Idaho (2026): What Changes When the Building Goes Up First

    Pole Barn Concrete Slab Cost in Eastern Idaho (2026): What Changes When the Building Goes Up First

    Pole barn concrete slab cost in Eastern Idaho runs $10 to $16 per square foot installed in 2026, the same range as any well-built shop floor. A 40 x 60 pole barn, 2,400 square feet, lands between $24,000 and $38,400 depending on thickness and what you drive on it. What makes a pole barn different is not the price per foot. It is everything that happens because the building is usually standing before the concrete shows up.

    I run Skinner Customs out of Rigby, and pole barn slabs are a big part of what we pour between Rexburg and Shelley. Most of the problems I get called to look at on post-frame buildings were not concrete problems at the pour. They were planning problems that turned into concrete problems.

    2026 pole barn slab pricing

    These numbers assume a 4,000 PSI mix, rebar reinforcement, compacted gravel base, a vapor barrier, and a standard finish:

    Building size Square footage 5-inch slab 6-inch slab
    30 x 40 1,200 sq ft $12,000 – $15,600 $14,400 – $19,200
    40 x 60 2,400 sq ft $24,000 – $31,200 $28,800 – $38,400
    50 x 80 4,000 sq ft $40,000 – $52,000 $48,000 – $64,000

    If you need the full breakdown on thickness by equipment load, we covered it in our shop slab cost guide. The short version: 5 inches for trucks, trailers, and hobby use, 6 inches for tractors, skid steers, and lifts.

    What those tables do not show are the post-frame costs that land on top: pumping, the apron, and anything that has to be fixed about the site before we can pour.

    Building first, slab second: why the order matters

    On most pole barns around here, the posts, trusses, roof, and walls go up first, and the slab gets poured inside the finished shell. There are real advantages. The roof keeps rain and snow off fresh concrete, the building defines the slab edges, and the pour is not racing the weather.

    The trade-off is access. A ready-mix truck cannot drive into a building. If the chute can reach every corner from the overhead door, great. If it cannot, we are pumping, and pump-truck day rates in Eastern Idaho run $850 to $1,400. On a 40 x 60 with one 12-foot door on the gable end, the back corners are a long way from a chute.

    What to do about it: put the biggest overhead door where a truck can back straight up to it, and if you have a choice, put a door on the long side too. Tell the building crew to leave the interior liner, insulation, and any framed rooms until the slab is in. Pouring and finishing around finished walls is slower, messier, and costs more.

    The posts and the slab have to be planned together

    In a post-frame building, the posts carry the roof and walls. The slab is a floor that sits inside them. That changes a few things:

    Separate the slab from the posts. Concrete shrinks as it cures and moves with temperature. If it is poured tight against a post with nothing between them, it has nowhere to go and it cracks at the post. An isolation joint around each post lets the slab move on its own.

    Line the control joints up with the posts where you can. A slab is going to crack where it wants to, and posts are natural stress points. Joints laid out on the post grid give those cracks a straight, planned place to happen.

    Check the skirt board before the pour, not after. The treated splash or skirt board at the bottom of the walls usually becomes the slab edge. If it was set out of level or at the wrong height, the slab will be too. Five minutes with a laser before we set up is a lot cheaper than a floor that drains toward the back wall.

    Site prep on farm ground

    Most pole barns in this area go up on old farm ground, and that is where the quiet failures start.

    Strip the topsoil. Organic soil compresses and rots. Gravel dumped on top of it settles unevenly, and the slab follows.

    Compacted gravel base, 4 inches minimum. Placed and compacted in lifts, and deeper where the ground is soft or has irrigation history. If the building crew brought in fill to level the pad, find out what it was and whether it was compacted.

    Vapor barrier. If the building is enclosed and you are storing anything you care about, put a vapor barrier under the slab. Ground moisture moving up through the concrete causes condensation, rust, and musty storage, and it will push a floor coating off later if you ever want one.

    Reinforcement: rebar, not mesh

    Every slab we pour gets #3 or #4 rebar on an 18-inch grid. Wire mesh is the low-bid shortcut. It is supposed to sit mid-slab, but it gets walked down to the bottom during the pour and ends up doing nothing. On a floor carrying jack stands, loaded trailers, and tractor tires, that matters.

    Our flatwork pricing starts at $8 per square foot, and pole barn slabs run above that because of thickness and reinforcement. A pole barn slab bid well under that in this market means something above got cut.

    Don’t forget the apron

    The concrete outside the overhead door takes more abuse than anything inside the building. It carries every wheel load in and out, it sits in snowmelt all winter, and it catches the road salt dripping off your truck.

    Plan the apron with the slab, not as an afterthought. It should slope away from the door, have a thickened edge where the tires cross, and ideally be poured the same day or tied to the slab so it does not heave independently. A quarter inch per foot of fall toward the door inside the building sends snowmelt out instead of pooling at the back wall.

    Decide on heat before the pour

    If there is any chance you want a heated pole barn, run in-floor radiant PEX before the concrete goes down. It adds roughly $3 to $6 per square foot at pour time. Retrofitting heat into a finished floor means an overlay or a tear-out. For a heated building, plan insulation under the slab and at the slab edge too, because that edge is where heat escapes to cold ground.

    The National Frame Building Association publishes post-frame construction resources that are worth reading before you order a building package, especially on how the building and the floor get detailed together.

    Frequently asked questions

    How much does a concrete slab cost for a 40 x 60 pole barn in Eastern Idaho? About $24,000 to $38,400 installed in 2026, depending on thickness, reinforcement, and site conditions. A 6-inch slab runs $28,800 to $38,400.

    Should the slab go in before or after the pole barn is built? Usually after the shell is up. The roof protects the pour and the walls define the edges. Just plan door placement for truck access and hold off on interior finishes until the floor is in.

    How thick should a pole barn slab be? 5 inches for trucks, trailers, and general use. 6 inches for tractors, skid steers, and lifts. Heavy equipment or commercial use needs an engineered slab.

    Do I need a vapor barrier under a pole barn slab? For an enclosed building used for storage, a shop, or anything heated, yes. It keeps ground moisture from coming up through the floor.

    Why does my pole barn slab crack at the posts? Usually because the slab was poured tight against the posts with no isolation joint, or the control joints were not laid out with the post grid.

    Get a pole barn slab bid

    Send the building size, door locations, what you plan to park or run on the floor, and whether the shell is up yet, and I will tell you what it takes.

    Need concrete work in Eastern Idaho? Call Zach at Skinner Customs at (208) 390-5794 or start at skinner-customs.com.


    Content produced in partnership with S4 Media, marketing partner of SwagerBuilds LLC.
  • Cost to Pour a Foundation for a Custom Home in Idaho (2026): Line-Item Numbers From a Concrete Contractor

    Cost to Pour a Foundation for a Custom Home in Idaho (2026): Line-Item Numbers From a Concrete Contractor

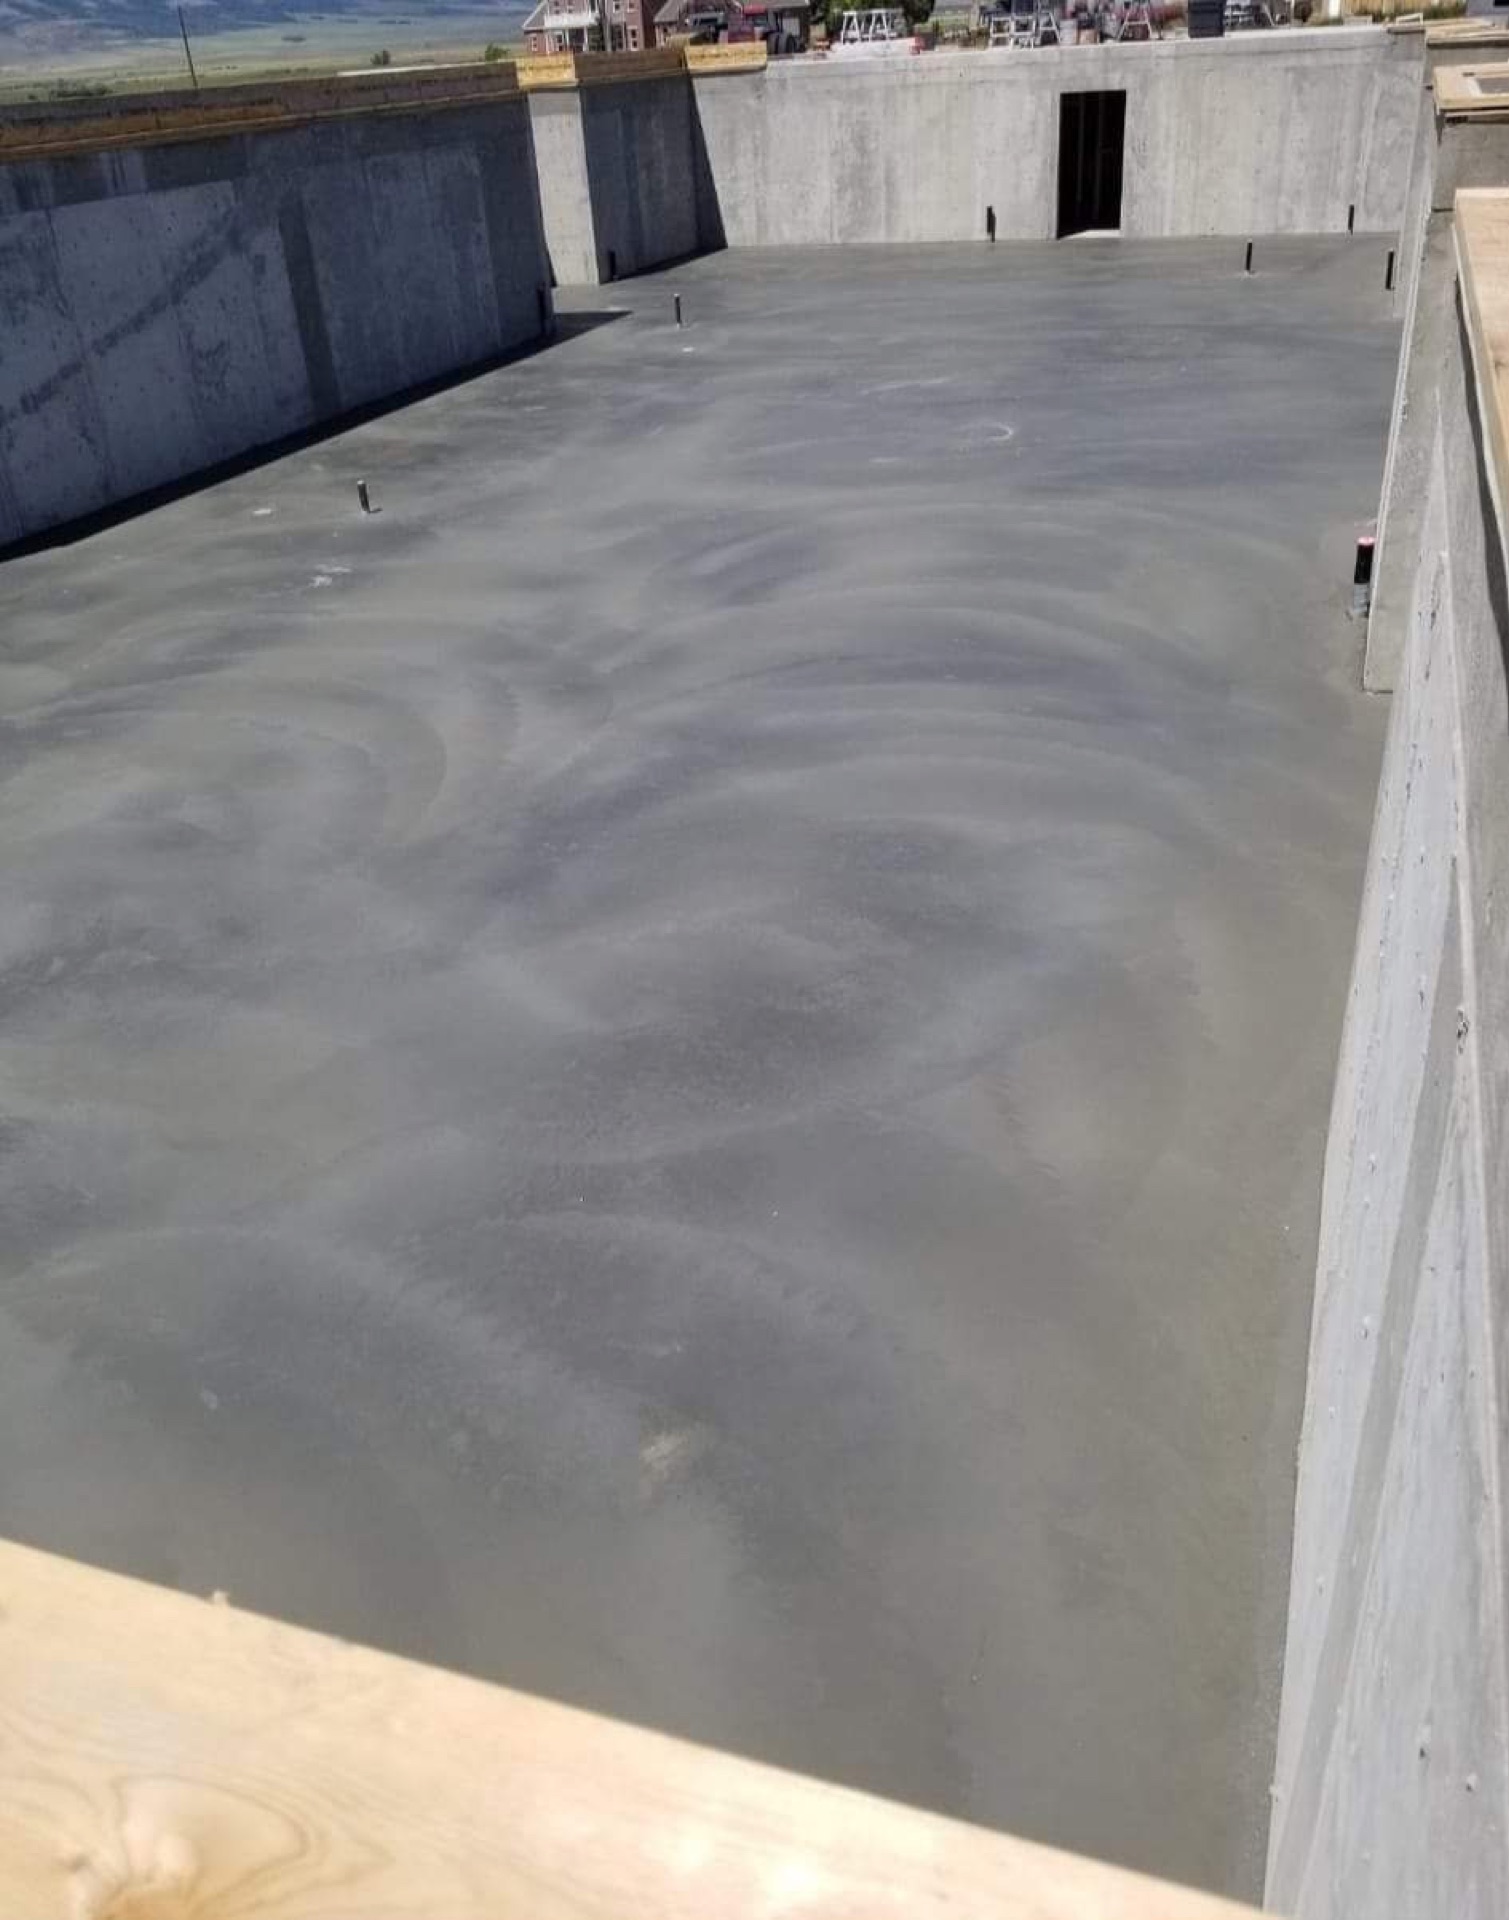
    The cost to pour a foundation for a custom home in Idaho is one of the biggest single numbers on the build, and it is also one of the least understood. For a 3,000 square foot full basement with the jogs and corners most custom plans have, the foundation package lands somewhere around $61,500 to $118,500 in 2026, before add-ons like pumping, winter protection, or a soils report. That is a wide range, and every dollar of the spread comes from something you can see on the plans or on the lot.

    I run Skinner Customs out of Rigby. We pour foundations, footings, and basement slabs across Jefferson, Bonneville, and Madison counties, and most of the foundation calls I get now are for custom homes where the owner has a set of plans and a number from somebody that does not add up. Here is how the number actually gets built.

    What a custom home foundation actually includes

    When people say “the foundation,” they usually mean five or six separate scopes that get bid together:

    1. Excavation and haul-off. Often done by the excavator, not the concrete sub, but it belongs in the foundation budget.
    2. Footings. The wide, reinforced base the walls sit on. They have to bear below frost depth.
    3. Foundation walls. Poured basement or crawlspace walls, formed, reinforced, and poured in place.
    4. The slab. Basement floor, crawlspace slab, or garage slab.
    5. Waterproofing and drain tile. Dampproofing on the outside of the walls and a perimeter drain at the footing.
    6. Code and site items. Radon rough-in, inspections, and anything the soils or the lot require.

    If two bids are $30,000 apart, the first thing to check is whether they include the same list.

    2026 line-item pricing in Eastern Idaho

    These are the installed ranges we published in our Ammon foundation cost breakdown, and they hold for custom homes across the region:

    Scope 2026 installed range
    Excavation and haul-off $3 – $8 per cubic yard
    Footings (16″ x 8″, #4 rebar) $12 – $22 per linear foot
    Foundation walls (8-ft poured) $95 – $170 per linear foot
    Basement or crawlspace slab $5 – $9 per sq ft
    Waterproofing (dampproofing) $3 – $7 per sq ft of wall
    Drain tile / perimeter drain $12 – $25 per linear foot
    Radon mitigation rough-in $400 – $900
    Geotechnical report $600 – $1,200

    Notice how much of that list is priced by the linear foot. That is the key to understanding custom home foundations.

    Worked example: 3,000 sq ft full basement

    Take a 3,000 square foot basement footprint. A plain rectangle that size has roughly 220 feet of perimeter. A custom plan with a bump-out, a covered entry, and a few corners easily runs 300 feet. Here is the 300-foot version:

    Line item Quantity Low High
    Excavation (with over-dig) ~1,200 cu yd $3,600 $9,600
    Footings 300 lf $3,600 $6,600
    Foundation walls, 8-ft 300 lf $28,500 $51,000
    Basement slab 3,000 sq ft $15,000 $27,000
    Dampproofing 2,400 sq ft of wall $7,200 $16,800
    Drain tile 300 lf $3,600 $7,500
    Total $61,500 $118,500

    That works out to about $20 to $40 per square foot of basement floor. Add a radon rough-in, a soils report, and a pump truck if access is tight, and you are $2,000 to $3,500 higher.

    Walls are the biggest line. On this example they are close to half the package, which is why the shape of the house matters more than the square footage.

    Foundation type changes everything

    The basement example is the most common custom home foundation around here, but it is not the only one:

    • Monolithic slab-on-grade: $8 to $12 per sq ft. Works for single-story homes on stable ground. Least expensive, least flexible.
    • Full basement (unfinished): $22 to $40 per sq ft of basement floor. The standard for most custom homes in the valley.
    • Full walkout basement: $28 to $50 per sq ft of basement floor. Sloped lots need stepped footings, more forming, and more waterproofing detail.

    A crawlspace lands between the slab and the basement, depending on wall height and how much of the site has to be dug.

    What pushes a custom home foundation to the high end

    Perimeter and corners. Every jog adds footing, wall, dampproofing, and drain tile, plus corner forming time. Two houses with the same square footage can be $20,000 apart on foundation cost purely on shape.

    Wall height and thickness. Eight-inch walls are standard for basements up to 8 feet. Taller walls usually go to 10 inches, which adds concrete, steel, and forming. If your plans call for 9 or 10-foot basement ceilings, expect the wall line to climb.

    Soil. Parts of this region sit on old irrigation-affected farm ground, clay pockets, or inconsistent fill. A $600 to $1,200 geotechnical report is cheap next to a footing redesign after the hole is dug. On questionable lots, get it before the plans are final.

    Distance from the batch plant. Concrete delivered to Rigby runs about $155 to $175 per yard. By the time a truck gets over the pass to Driggs, it is $205 to $245. On a custom home foundation that uses a lot of yards, that difference alone moves the bid by thousands.

    Season. Standard foundation pours run early April through late October. We can pour into November and December with cold-weather admixtures, blankets, and heaters, but each cold-weather pour adds $600 to $1,500. A basement is several pours, so that adds up.

    Access. If the ready-mix truck cannot get within chute reach of the walls, you are paying for a pump. Pump-truck day rates in Eastern Idaho run $850 to $1,400.

    The specs that should not be negotiable

    A cheap foundation bid usually gets cheap in places you will never see again once it is backfilled. Get these in writing:

    • Footing depth below frost. Frost depth is set by your county building department. In Bonneville County, the minimum footing depth is 36 inches below finished grade. Do not assume the next county over matches; confirm before the footing is dug.
    • Concrete strength. 3,500 PSI minimum for footings and 4,000 PSI minimum for walls. 4,500 PSI walls hold up better in our freeze-thaw cycles.
    • Reinforcement. Rebar, sized and placed per the plans. At Skinner Customs we use rebar on every pour. We do not use wire mesh.
    • Drainage. Real perimeter drain tile and dampproofing, with the lot graded away from the house.

    The American Concrete Institute’s ACI 332 Code Requirements for Residential Concrete is the standard most residential foundation work in this region is built to. Your engineer and your county inspector will reference it, and your concrete contractor should know it cold.

    Bring the concrete contractor in before the plans are final

    The cheapest foundation is the one that was designed with the pour in mind. Wall heights, window wells, garage frost walls, and walkout steps are all easier to price, and often easier to simplify, before the plans are stamped. On builds where the concrete crew and the custom home builder in Eastern Idaho running the project are talking early, the foundation bid comes in tighter and the schedule does not slip waiting on a redesign.

    Frequently asked questions

    How much does it cost to pour a foundation for a custom home in Idaho?
    For a 3,000 sq ft full basement with a typical custom perimeter, roughly $61,500 to $118,500 in 2026, before add-ons. Monolithic slabs run $8 to $12 per sq ft; walkout basements run $28 to $50 per sq ft of basement floor.

    Is a basement or a crawlspace cheaper?
    A crawlspace is usually cheaper because the walls are shorter and there is less excavation. A basement costs more but adds usable square footage for far less than building the same space above grade.

    What is the frost depth for foundations in Eastern Idaho?
    It is set by each county. Bonneville County requires footings at least 36 inches below finished grade. Confirm with your county building department before the footing is excavated.

    Do I need a soils report for a custom home foundation?
    It is not always required for residential work, but on farm ground, fill, or any lot with unknown history it is worth the $600 to $1,200. It gives the footing design something real to stand on.

    Can a foundation be poured in winter in Idaho?
    Yes, with cold-weather admixtures, insulated blankets, and heat. Expect $600 to $1,500 extra per pour, and a basement usually takes several pours.

    Get a line-item foundation bid

    Send your plans, the lot location, and whether you have a soils report, and I will give you a foundation number broken out line by line so you can compare it against anyone else’s.

    Need concrete work in Eastern Idaho? Call Zach at Skinner Customs at (208) 390-5794 or start at skinner-customs.com.


    Content produced in partnership with S4 Media, marketing partner of SwagerBuilds LLC.

  • The Best Concrete Sealer for a Cold Climate — What Actually Works in Idaho Winters

    The Best Concrete Sealer for a Cold Climate — What Actually Works in Idaho Winters

    The best concrete sealer for cold climates is a penetrating silane-siloxane, not the glossy acrylic sitting at eye level in the hardware store aisle. Penetrating sealers soak into the pore structure and repel water from inside the concrete. Film-forming sealers sit on top, and in a freeze-thaw climate that difference decides whether your driveway lasts fifteen years or five.

    I run Skinner Customs out of Rigby. Most of the failed sealer I get called out to look at across Jefferson, Bonneville, and Madison counties is not failed because someone bought a cheap product. It is failed because someone bought the wrong category of product for a climate that swings above and below freezing all winter.

    The two categories, and why it matters here

    Penetrating sealers — silanes, siloxanes, and silicate densifiers — chemically bond inside the concrete’s capillaries. There is no film. The slab looks exactly the same after application as before. Water beads on the surface and rolls off, but water vapor can still move out of the slab.

    Film-forming sealers — acrylics, urethanes, epoxies — form a layer on top. They make the surface glossy and darken the concrete, which is why they are the right choice for stamped and colored work where appearance is the point.

    Here is the failure mode nobody mentions on the label. A slab always contains some moisture, and it always wants to move upward and out. A penetrating sealer lets vapor pass. A film-forming sealer traps it. When that trapped moisture reaches the underside of the film and then freezes, it delaminates the film off the concrete — and often takes a layer of paste with it. That is why a driveway sealed with a bargain acrylic looks white and blotchy after one winter and starts peeling in the second.

    In a climate with as many freeze-thaw cycles as we get in these valleys — where the temperature can cross 32 degrees twice in a day — vapor permeability is not a nice-to-have. It is the whole game.

    What to buy, by surface

    Plain grey driveway, sidewalk, RV pad, apron. Penetrating silane-siloxane blend. Look for 20 percent solids or higher; the $20 gallon at 5 percent solids is mostly carrier. Reapply every 2 to 3 years, annually where road salt lands.

    Stamped or colored patio. You need a film to hold the color and the sheen, so this is the exception. Use a quality solvent-based acrylic — solvent-based penetrates and bonds better than water-based on decorative work — and accept a 1 to 2 year reseal cycle. Ask for a slip-resistant additive; wet stamped concrete with a gloss coat is genuinely dangerous.

    Garage floor. Do not seal it if you intend to coat it. A penetrating sealer is the single most reliable way to stop an epoxy or polyaspartic system from bonding. If you are not coating it, a penetrating sealer plus a densifier handles road salt and tire pickup.

    Interior polished or exposed slab. Lithium or sodium silicate densifier. It hardens the surface rather than covering it.

    Anything under a coating, ever. Nothing. Leave it bare.

    The mistakes that cost people money

    Buying by gloss. The wet-look shine that sells the product in the store is a film. On exterior flatwork in Idaho, that shine is a liability.

    Applying too heavy. This is the most common DIY failure by a wide margin. Penetrating sealers are meant to be applied to refusal — the slab takes what it takes and you squeegee off the rest. Leaving excess on the surface gives you a sticky, streaky residue. Two thin coats always beat one heavy coat.

    Sealing a damp slab. The concrete needs 24 to 48 hours dry, longer in shade or after a heavy rain. Sealing damp concrete traps exactly the water you were trying to exclude.

    Sealing too cold. Surface temperature needs to be consistently above about 50 degrees, and the slab needs a full cure window with no freeze. Cold-applied sealer does not cure — it sits there and then fails.

    Sealing new concrete too early. Wait roughly 30 days. Fresh concrete is still giving off moisture and still gaining strength.

    Sealing over a failed sealer. New product over peeling old product peels together. The old film has to be stripped or ground off first, which is real work and real money — and the main reason I tell people to get the category right the first time.

    Reading a label without the marketing

    Three things tell you what you are actually buying.

    Active ingredient. “Silane,” “siloxane,” or “silane-siloxane” means penetrating. “Acrylic,” “urethane,” or “epoxy” means film-forming. If the label will not say, that is an answer too.

    Percent solids. For a penetrating sealer, higher is better and 20 percent or more is a reasonable floor. Low-solids products are diluted and need more frequent reapplication.

    Coverage rate. Penetrating sealers typically cover 150 to 250 square feet per gallon on broom-finished concrete. If a product claims 400-plus square feet per gallon on exterior flatwork, it is thin.

    Ignore the years-of-protection number on the front. That figure comes from lab conditions, not from a Rigby driveway that gets plowed, salted off the county road, and cycled through freezing forty times a winter.

    What we use and why

    On Skinner Customs flatwork, plain grey exterior concrete gets a penetrating silane-siloxane. Decorative work gets a solvent-based acrylic because the customer is paying for color and sheen and there is no way to deliver that without a film — but I tell people up front that a film means a shorter reseal cycle, and that is the trade they are making when they choose stamped over broom.

    The sealer is the last line, not the first. Air-entrained 4,000 PSI mix, a properly compacted base, rebar rather than wire mesh, and a broom finish that was not overworked do more for winter survival than any product in a bucket. Sealing a well-poured slab extends its life a long way. Sealing a badly poured slab delays the inevitable.

    Frequently asked questions

    What is the best sealer for a concrete driveway in Idaho? A penetrating silane-siloxane blend at 20 percent solids or higher. It handles freeze-thaw and de-icing salt without trapping vapor, and it does not change how the concrete looks.

    Is a wet-look sealer bad for cold climates? On exterior grey flatwork, yes. Wet-look means film-forming, and films trap moisture that then freezes underneath and delaminates them. On covered decorative work it is fine.

    Can I put a penetrating sealer over an acrylic sealer? No. The penetrating product cannot reach the concrete through the film. The old sealer has to come off first.

    How do I know which sealer is already on my concrete? Pour water on it. If it beads and the concrete does not darken, it is sealed. If the surface is glossy or has any peeling, cloudiness, or white blush, it is a film-forming product. A dull, natural-looking surface that still beads water is penetrating.

    Do I need to seal a garage floor before epoxy? No — the opposite. Sealer prevents the coating from bonding. Garage slabs that will be coated should be bare, and the surface needs mechanical profiling rather than sealing.

    How much sealer do I need for a two-car driveway? At roughly 600 square feet and 150 to 250 square feet per gallon, plan on 2.5 to 4 gallons per coat, and most penetrating products want two coats.

    Not sure what is on your slab?

    Send me a photo of the surface and a photo of water sitting on it and I can usually tell you what sealer is there, whether it is still working, and whether it needs to come off before anything new goes down.

    Need concrete work in Eastern Idaho? Call Zach at Skinner Customs — (208) 390-5794 — or start at skinner-customs.com

    Content produced in partnership with S4 Media, marketing partner of SwagerBuilds LLC.

  • Concrete Sealing Cost in Eastern Idaho (2026) — Real Prices and How Often You Actually Need It

    Concrete Sealing Cost in Eastern Idaho (2026) — Real Prices and How Often You Actually Need It

    Concrete sealing cost in Eastern Idaho runs about $1.25 to $3.00 per square foot in 2026 for a professionally applied penetrating sealer, including surface prep. A typical 600-square-foot two-car driveway lands between $750 and $1,800. Decorative work that needs a film-forming sealer to hold its color costs more, and a grind-and-seal or thin-film system runs $3 to $4 per square foot.

    I run Skinner Customs out of Rigby. We pour flatwork across Jefferson, Bonneville, and Madison counties, and sealing is the cheapest thing on my price list that actually changes how long a slab lasts. It is also the service I most often talk people out of, because on the wrong slab it is money burned.

    What sealing costs by size

    Area Square footage Penetrating sealer Decorative / film-forming
    Sidewalk or entry 150 sq ft $190 – $450 $300 – $600
    Single driveway 400 sq ft $500 – $1,200 $800 – $1,600
    Two-car driveway 600 sq ft $750 – $1,800 $1,200 – $2,400
    Driveway + walkway 900 sq ft $1,125 – $2,700 $1,800 – $3,600
    Large drive / RV pad 1,500 sq ft $1,875 – $4,500 $3,000 – $6,000

    The spread inside each row is prep, not product. A slab that has been power-washed clean and has no oil staining sits at the bottom of the range. A slab with tire marks, oil, efflorescence, or an old failing sealer that has to come off first sits at the top, because stripping a failed film-forming sealer is genuinely more work than the sealing itself.

    These are regional installed ranges consistent with what Idaho coating contractors publish and what national cost data shows for the same work. We quote a specific number after we walk the slab, because prep is the whole variable.

    Why the number is small and the payoff is not

    Put it against the alternative. A concrete driveway replacement in Rigby runs $8 to $13 per square foot installed. On a 600-square-foot driveway that is $4,800 to $7,800. Sealing that same driveway every three years at $1,200 a cycle costs you roughly $400 a year to defer a five-figure replacement.

    That math only works if the slab underneath is sound. Sealing is protection, not repair.

    How often to reseal in this climate

    The generic answer everywhere else is every two to three years. In Eastern Idaho I split it:

    Every 2 to 3 years — driveways, patios, and walkways with a penetrating sealer and normal exposure. This is the standard interval for a silane-siloxane penetrating sealer in a freeze-thaw climate.

    Every year — any surface that gets direct de-icing salt. That means the apron where the county road meets your driveway, and anywhere you park a vehicle that drips road slush. Salt exposure roughly doubles the wear rate on the sealer.

    Every 1 to 2 years — decorative, stamped, and colored work with a film-forming sealer. The film is what makes the color pop, and film wears faster than penetration. If your stamped patio has gone flat and chalky, that is the sealer, not the color.

    Once, at 30 days — new concrete. Fresh concrete should cure roughly a month before its first seal. Sealing too early traps water in a slab that is still giving off moisture.

    A simple field test: pour a cup of water on the slab. If it beads, the sealer is working. If it soaks in and darkens the concrete within a minute, you are due.

    When sealing is a waste of money

    I will tell you this before I quote it.

    The slab is settling or heaving. Sealer does not fix subgrade. If one section has dropped and there is a lip at the joint, you have a base problem, and sealing it just makes a smoother version of the same problem.

    It is cracked through in multiple places. Structural cracks mean the slab has already failed. Fill them, but do not spend on a full seal job you will tear out in two years.

    The surface is already scaling badly. Once the paste has flaked off and the sand is exposed, a sealer has nothing dense to penetrate into. That slab needs an overlay or replacement, not a coat of sealer.

    It was poured without air entrainment. If the mix was wrong, sealing buys time but the surface will keep coming apart from the inside. This is the case where I will tell you to plan for replacement and seal only to stretch the timeline.

    It is an interior slab under a coating. If you are putting down epoxy or polyaspartic, do not seal first. A penetrating sealer is exactly what stops a coating from bonding.

    Timing matters more than most people think

    Sealer needs surface temperatures consistently above roughly 50 degrees and enough of a window for the product to cure without freezing. That is a real constraint here. Rigby carries a 50 percent chance of hitting 32 degrees by around September 20, and Idaho Falls runs a little earlier. In practice our reliable sealing window closes in the first half of October.

    The slab also has to be genuinely dry — usually 24 to 48 hours after the last rain, longer if it has been sitting in shade. Sealing a damp slab traps the moisture you were trying to keep out.

    Early September is close to ideal: the slab has been drying all summer, surface temps are still comfortably in range, and you are ahead of the first freeze rather than chasing it.

    DIY versus hiring it out

    Sealing is one of the few concrete jobs a homeowner can genuinely do. Material runs roughly $0.20 to $0.60 per square foot at a big-box store, so the product on a 600-square-foot driveway is $120 to $360.

    Where DIY goes wrong is always the same three places. Prep — a slab that is not properly cleaned seals dirt to the concrete. Product choice — the shelf at the hardware store is heavy on film-forming acrylics that look great for a season and then peel and cloud. And application rate — most failures are from putting it on too thick, which leaves a sticky, blotchy surface that has to be stripped.

    If it is a plain grey driveway and you are willing to read the data sheet, do it yourself. If it is stamped, colored, or has an existing sealer that needs to come off, hire it. Stripping a botched sealer costs more than the original job would have.

    Frequently asked questions

    How much does it cost to seal a 600 square foot driveway in Idaho Falls? Roughly $750 to $1,800 with a penetrating sealer, depending on how much prep the slab needs. Add roughly 35 to 60 percent if it is stamped or colored and requires a film-forming product.

    How long does concrete sealer last? Two to three years for a penetrating silane-siloxane in this climate. One year on surfaces that see direct de-icing salt. One to two years for film-forming sealers on decorative work.

    Can I seal concrete in the fall? Yes, and early fall is one of the two best windows of the year here. You need surface temps consistently above about 50 degrees and no freeze during the cure. In Eastern Idaho that generally means finishing by early to mid October.

    Should I seal a brand new driveway? Yes, after about 30 days of cure. And keep every de-icing chemical off it through its first full winter — use sand for traction instead.

    Does sealing make concrete slippery? Film-forming sealers can, especially on a smooth finish. Penetrating sealers do not change surface texture at all. If you are sealing a decorative surface with a film, ask for a slip-resistant additive in the topcoat.

    Is sealing worth it on a patio that never sees salt? For plain grey concrete under cover, it is optional. For stamped or colored work, yes — the sealer is what keeps the color from fading and the surface from absorbing stains.

    Get a number for your slab

    Send a couple of photos and the rough dimensions and I will tell you what sealing your slab costs, what interval it needs, and whether it is worth doing at all. If the honest answer is that your driveway needs replacing rather than sealing, I would rather say so now than take the money.

    Need concrete work in Eastern Idaho? Call Zach at Skinner Customs — (208) 390-5794 — or start at skinner-customs.com


    Content produced in partnership with S4 Media, marketing partner of SwagerBuilds LLC.
  • What Winter Actually Does to Concrete in Eastern Idaho — and How to Stop It

    What Winter Actually Does to Concrete in Eastern Idaho — and How to Stop It

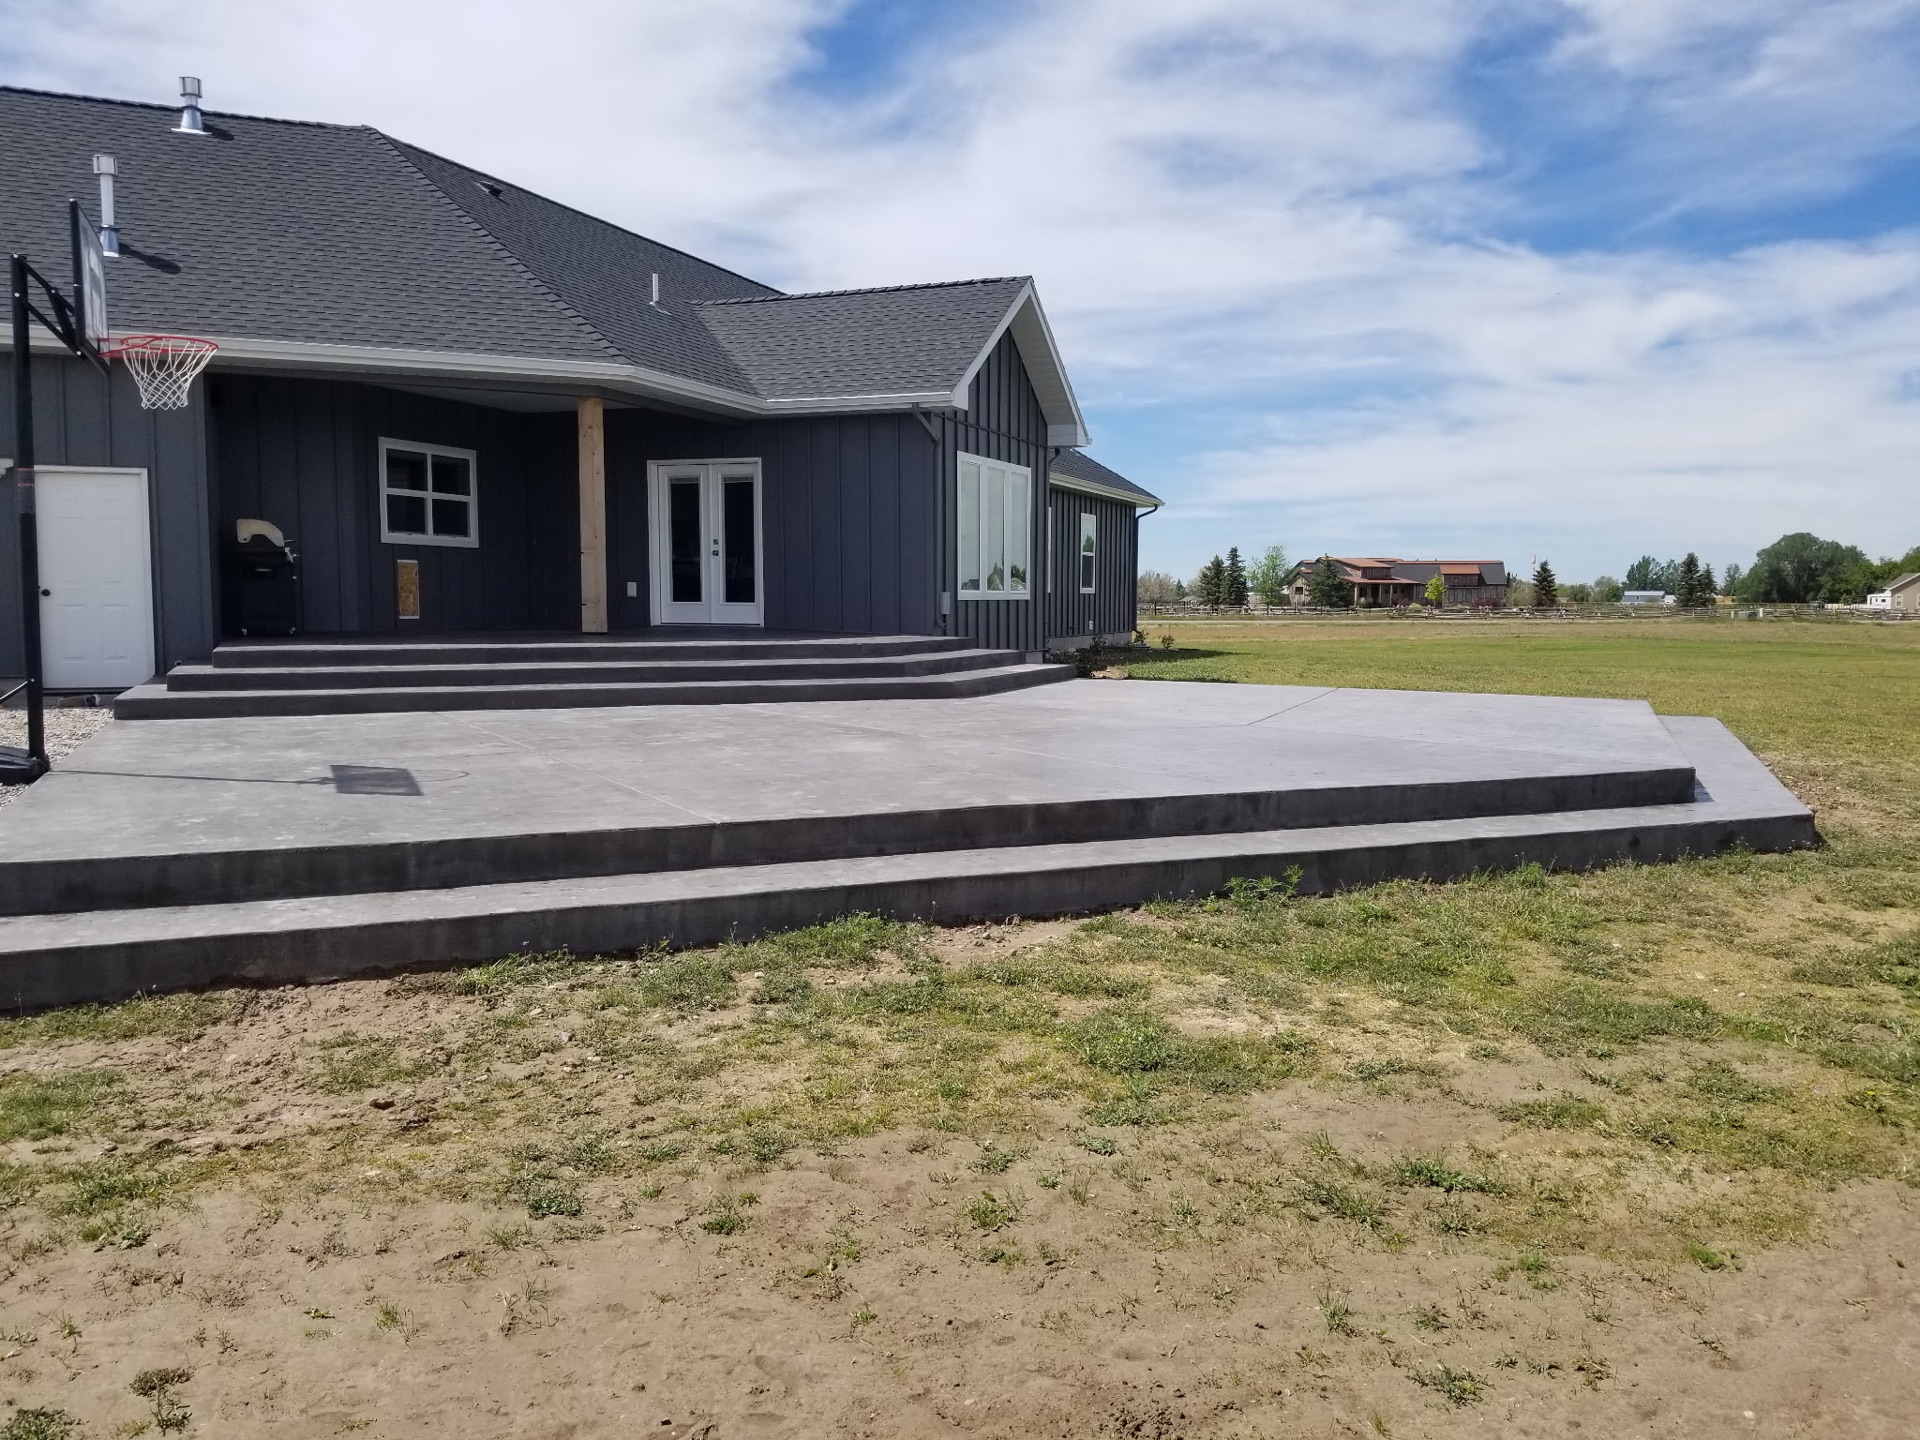
    Winter concrete damage in Eastern Idaho is not caused by cold. It is caused by water that is already inside your slab when the temperature crosses 32 degrees — over and over, sometimes twice in the same day. Water expands about 9 percent when it freezes. A slab that has soaked up moisture all fall gets pushed apart from the inside every time that happens.

    I run Skinner Customs out of Rigby. We pour and repair flatwork across Jefferson, Bonneville, and Madison counties, and this is the single most common thing I get called about in April: a driveway that looked fine in October and looks chewed up by spring. It is almost never a bad pour. It is a slab that went into winter unprotected.

    Here in Rigby, the National Gardening Association’s frost data puts the first frost risk around September 7, with a 50 percent chance of hitting 32 degrees by roughly September 20. Idaho Falls starts a little earlier. That is your real deadline, and it is closer than most people think.

    The two things that wreck concrete here

    There are only two, and they compound each other.

    Freeze-thaw cycling. Concrete is porous. It holds water the way a sponge does, just more slowly. When that water freezes it expands and pushes outward on the pore walls. When it thaws it draws more water in. Our high-desert valley climate is unusually hard on concrete because we do not just freeze once and stay frozen — we swing above and below 32 degrees repeatedly through the winter, sometimes inside a single 24-hour period. A slab in a place that freezes in November and stays frozen until March gets fewer damage cycles than a slab in Rigby.

    Salt scaling. De-icing salt makes it worse in two ways. It lowers the freezing point, which means more freeze-thaw cycles at temperatures that would otherwise have left your concrete alone. And it is hygroscopic, so it actively pulls moisture into the surface. Sodium chloride and calcium chloride are the two worst offenders, and both come off the county roads on your tires and get deposited on your driveway whether you spread any yourself or not.

    What the damage actually looks like

    People use “spalling” and “scaling” interchangeably. They are different failures with different causes, and telling them apart tells you what went wrong.

    Scaling is the top layer going. The surface paste flakes off in thin sheets, maybe an eighth of an inch, and the sand underneath starts showing through. It looks like the concrete has gotten rough and sandy in patches, usually worst where water sits or where you park a car that drips road salt off the wheel wells. Scaling is a surface-durability problem — bad air entrainment, an overworked or overwatered finish, or de-icing salt on concrete that was never sealed.

    Spalling is deeper. Chunks pop off, quarter-sized to palm-sized, leaving craters that expose the aggregate. It often starts at joints, edges, and cracks, because that is where water gets in fastest. If you see rust staining in the crater, water has reached rebar and you have a bigger problem than a surface issue.

    Pop-outs are small cone-shaped divots, usually the size of a nickel, with a piece of aggregate at the bottom. That is a single porous stone in the mix absorbing water and freezing. Cosmetic, not structural.

    Joint deterioration — crumbling and widening at the control joints — is usually the first thing to show up, because joints are an open path straight into the slab.

    The honest read: scaling and pop-outs are cosmetic-to-moderate. Spalling with exposed rebar means the clock is running.

    Why some slabs survive and others do not

    Three things decide it, and two of them are settled before the truck leaves.

    Air entrainment. Air-entrained concrete has millions of microscopic bubbles deliberately mixed in. They give freezing water somewhere to expand into instead of pushing on the paste. For exterior flatwork in a freeze-thaw climate the accepted target is roughly 5 to 7 percent entrained air. This is not optional here, and it is the number one reason a driveway poured by somebody’s cousin comes apart in three winters. Ask for the mix ticket.

    Water-to-cement ratio. More water makes concrete easier to place and weaker when it sets. A wet, sloppy pour gives you a porous surface that drinks moisture all winter. Every Skinner Customs exterior pour is 4,000 PSI minimum for exactly this reason.

    Finish and cure. Overworking the surface with a power trowel on exterior concrete brings fines and water to the top and creates a dense skin that can delaminate. A broom finish is not just for traction — it is the correct finish for exterior flatwork in this climate.

    If your slab has all three right, sealing is protection. If it has them wrong, sealing buys you time but will not save it. I would rather tell you that up front than sell you a seal job on a slab that is already failing.

    The first winter rule

    New concrete is the most vulnerable concrete. Do not put any de-icing chemical on a slab in its first winter — not rock salt, not ice melt, not the pet-safe stuff. Use sand for traction instead. Concrete keeps gaining strength for months after the pour, and the surface has not fully hardened against chemical attack yet.

    That rule matters right now for anybody who poured this spring or summer. If we did your driveway or patio this season, sand only through spring 2027.

    What to do before the first hard freeze

    Short list, in order of what actually moves the needle.

    1. Get water off the slab. Clean out the control joints. Make sure downspouts discharge past the concrete, not onto it. Check that the grade still falls away from the slab — irrigation and settling change that over a few seasons. A slab that sheds water is doing most of the work for you.
    2. Fill open cracks and failing joints. Any crack wide enough to take a credit card is a funnel. Sealant is cheap. Water in a crack that freezes turns a hairline into a structural problem.
    3. Seal it, if the surface temperature will cooperate. Penetrating sealers need surface temps consistently above about 50 degrees and a clear window with no freeze for the cure. That window closes here in early to mid October most years.
    4. Switch off salt. Sand, or magnesium chloride if you must use a chemical. Keep it off decorative and stamped work entirely.
    5. Do not chip ice with a steel blade. A plastic shovel and a poly-edged blade on the plow. Most of the edge damage I see was done by equipment, not weather.

    Repair now or wait until spring?

    If the damage is surface scaling and the slab is otherwise sound, you can wait — but seal it and stay off the salt so it does not get worse over the winter. If you have spalling at joints with water actively getting in, address it before freeze-up, because every cycle between now and April makes the repair bigger.

    If the slab is settled, heaving, or cracked all the way through in multiple places, sealing and patching is money spent on a slab that is already lost. Our flatwork pricing starts at $8 per square foot, and a driveway replacement in Rigby runs $8 to $13 per square foot installed. Sometimes the honest answer is that a $900 repair on a $12,000 slab is the wrong trade — and sometimes it is exactly the right one. It depends on what is under it, which is why I look before I quote.

    For homeowners weighing a repair against a tear-out, the cost to replace a driveway in Rigby is the number to hold the repair estimate against.

    On new construction we settle this at the design stage. When we pour for a custom home builder in Rigby, drainage, slab slope, and the sealing schedule get decided before anything is placed, which is far cheaper than solving it from the outside two winters later.

    Frequently asked questions

    Is spalling concrete a structural problem? Usually not on its own. Surface scaling and pop-outs are cosmetic. Spalling that exposes rebar is different — once water reaches steel, the steel rusts, rust expands, and it drives more concrete off. That one needs attention.

    Can you fix spalled concrete, or does it have to be replaced? Sound slabs with surface damage can be resurfaced with an overlay, which is far cheaper than replacement. Slabs that are settling, heaving, or cracked through the full depth should be replaced. An overlay on a failing slab is a nice finish on a failing slab.

    Does sealing actually prevent freeze-thaw damage? It prevents the water absorption that causes it, which is most of the battle. A penetrating sealer keeps liquid water and dissolved salt out of the pore structure. It does not fix concrete that was poured without air entrainment.

    Why does my neighbor’s driveway look fine and mine does not? Almost always mix and finish, not luck. Air entrainment, water content, and whether the surface was overworked. Sun exposure and drainage explain the rest — a north-facing slab that stays damp cycles more than a south-facing one that dries out.

    Is it too late in the season to seal? In Eastern Idaho, early September is close to ideal — the slab is dry from summer and daytime surface temps are still well above 50 degrees. By mid-October you are gambling on the cure. If you are reading this in November, wait for spring and focus on drainage and de-icer discipline instead.

    Get a straight answer on your slab

    If you have flaking, craters, or joints coming apart and you are not sure whether it is a seal job, a resurface, or a replacement, send photos and I will tell you which one it is. I will also tell you when the answer is “leave it alone until spring.”

    Need concrete work in Eastern Idaho? Call Zach at Skinner Customs — (208) 390-5794 — or start at skinner-customs.com

    Content produced in partnership with S4 Media, marketing partner of SwagerBuilds LLC.
  • Concrete Shop Slab Cost in Eastern Idaho (2026) — Thickness, Rebar, and Real Numbers

    Concrete Shop Slab Cost in Eastern Idaho (2026) — Thickness, Rebar, and Real Numbers

    The concrete shop slab cost in Eastern Idaho runs $9 to $16 per square foot installed in 2026. A 40 x 60 shop — 2,400 square feet, the size most people around here build — lands between $21,600 and $38,400 depending on thickness, reinforcement, and what you plan to drive on it.

    I run Skinner Customs out of Rigby. We pour shop slabs, pole barn floors, and equipment pads across Jefferson, Bonneville, and Madison counties. Shop slabs are the job where the difference between a good bid and a cheap bid shows up fastest, because the loads are real and the failure mode is expensive.

    The single question that sets your price

    Not square footage. Thickness — and thickness is driven by what rolls across it.

    4 inches. Cars, light pickups, storage, a workbench. This is a garage floor, not a shop floor. If someone bids a 4-inch slab for a building you plan to put a tractor in, they either did not ask or did not listen.

    5 inches. Three-quarter-ton and one-ton trucks, a car lift, an ATV and trailer, general hobby shop use. This is the honest minimum for most residential shops in this area.

    6 inches. Tractors, skid steers, loaded trailers, a two-post lift with a heavy vehicle on it, dually trucks. Most working shops around Rigby and Idaho Falls should be at 6 inches.

    8 inches with engineered reinforcement. Semi traffic, heavy equipment, commercial use. At this point the slab needs actual engineering, not a rule of thumb.

    Every additional inch adds roughly $1.50 to $2.50 per square foot. On a 2,400 square foot shop, going from 4 inches to 6 costs about $7,200 to $12,000 more. That sounds like a lot until you price cutting out and repouring a failed slab inside a finished building — which runs three to four times the original cost because now everything has to be done by hand through a man door.

    Pour it right the first time. You get exactly one easy shot at it.

    Real cost by shop size in Eastern Idaho

    Shop size Square footage 5-inch slab 6-inch slab
    24 x 30 720 sq ft $7,200 – $9,400 $8,600 – $11,500
    30 x 40 1,200 sq ft $12,000 – $15,600 $14,400 – $19,200
    40 x 60 2,400 sq ft $24,000 – $31,200 $28,800 – $38,400
    50 x 80 4,000 sq ft $40,000 – $52,000 $48,000 – $64,000
    60 x 100 6,000 sq ft $58,000 – $76,000 $70,000 – $93,000

    Larger slabs get slightly better per-foot pricing because setup and mobilization spread across more area. These numbers assume 4,000 PSI mix, rebar reinforcement, compacted gravel base, vapor barrier, and a standard broom or light steel-trowel finish.

    What a cheap shop slab bid leaves out

    When a bid comes in dramatically low, it is almost always one of these five.

    Wire mesh instead of rebar. This is the most common shortcut and the one I will not do. Wire mesh is supposed to sit mid-slab. In practice, the moment concrete goes down, crews walk it into the bottom of the pour and it sits there doing nothing. On a shop slab carrying point loads from jack stands, lift posts, and equipment tires, that is the difference between a slab that holds and one that cracks in a grid pattern within a few winters. Every Skinner Customs shop slab gets #4 rebar on an 18-inch grid, chaired up off the base so it stays where it belongs.

    No vapor barrier. A 10 to 15 mil poly barrier under the slab runs a few hundred dollars on a shop-sized pour. Without it, ground moisture moves up through the slab continuously. You get a floor that sweats, rusts anything sitting on it, and will never hold an epoxy coating or paint. If you think you might ever coat that floor, the vapor barrier is not optional.

    Thin or uncompacted base. Minimum 4 inches of compacted gravel, placed and compacted in lifts, more where the soil is soft. A lot of ground in this area is old farm ground with irrigation history and inconsistent fill. Skipping compaction saves a day and costs you a settled slab.

    No thickened edges or footings. The slab perimeter carries the building. Thickened edges or a proper footing detail — sized to the building and to local frost requirements — is structural, not optional. Check with your county building department on frost depth requirements; in much of Eastern Idaho you are designing around 30-plus inches.

    No control joints, or joints cut too late. Joints need to be cut within the first 6 to 18 hours depending on conditions, at spacing roughly 24 to 30 times the slab thickness in inches. On a 6-inch slab that is joints every 12 to 15 feet. Cut too late and the slab has already cracked where it wanted to.

    Our flatwork pricing starts at $8 per square foot, and shop slabs run above that because of the added thickness and reinforcement. A shop slab bid under $8 in this market is not a bargain — it means one of the five items above came out.

    Details worth paying for

    Slope to the door. A quarter inch per foot of fall toward the overhead door means snowmelt off your truck runs out instead of pooling at the back wall. Free if it is planned, impossible to add later.

    Floor drain. If you are washing equipment inside, plan the drain and the plumbing before the pour. Check with your county on discharge requirements — a shop drain that handles vehicle wash water may have restrictions on where it can go.

    In-floor radiant heat. If there is any chance you want a heated shop, run the PEX before the pour. Adding tubing costs roughly $3 to $6 per square foot at pour time. Retrofitting heat into a finished shop means either an overlay slab or tearing out. Even if you are not ready to install the boiler, laying the loops and capping them is cheap insurance.

    Saw-cut layout planned around the building. Joints should line up with column lines and door openings, not wander across the middle of your work bay.

    Plan for coatings. If a polished, sealed, or epoxy floor is anywhere in your future, say so upfront. It changes the finish we put on the slab and it makes the vapor barrier non-negotiable. A hard steel-trowel finish that looks great bare can actually be too tight to bond a coating to properly.

    If the shop is part of a larger build, get the concrete scope coordinated with the rest of the project early. On builds where we work with a trusted local builder, the slab specs get settled before the building is ordered, which avoids the common mess of a building package that assumes one foundation detail and a slab designed for another.

    Timing your pour

    Our reliable pour window in Eastern Idaho runs late April through early October. We pour outside that window with cold-weather additives, blankets, and ground heaters, and the results are fine when it is done right — but it costs more and it takes longer.

    The bigger scheduling factor on shop slabs is sequencing. If the building is going up first, you are pouring inside a structure, which means pump access and hand work. If the slab goes first, you get truck access and a faster, cleaner pour. Talk through which order makes sense before anybody breaks ground, because it affects both cost and schedule.

    Frequently asked questions

    How thick should a shop slab be for a tractor? Six inches with #4 rebar on an 18-inch grid over a properly compacted base. A compact tractor might get by on 5 inches, but the incremental cost of going to 6 is small compared to the cost of being wrong.

    Do I need a vapor barrier under a shop slab? Yes. It costs a few hundred dollars on a typical shop and it prevents ground moisture from moving through the slab. Without it you will have a floor that sweats and you will never successfully coat it.

    How long before I can drive on a new shop slab? Light foot traffic at 24 to 48 hours. Passenger vehicles at 7 days. Heavy equipment at 28 days, when the concrete has reached design strength. Rushing heavy loads onto a green slab causes damage that shows up later as cracking.

    Can you pour a slab inside an existing pole barn? Yes, and we do it regularly. It costs more per square foot because the truck cannot reach the pour area, so we are pumping and doing more hand work. Budget 15 to 25 percent above an open-site pour of the same size.

    What PSI should a shop slab be? 4,000 PSI minimum in this climate. For heavy equipment traffic we will often go higher. Anything under 4,000 on a slab that sees freeze-thaw and real loads is a false economy.

    Getting a real number for your shop

    Shop slab pricing depends on size, thickness, site conditions, access, and whether the building is already up. Send the building dimensions, what you plan to drive on it, and photos of the site, and we can get specific.

    Need concrete work in Eastern Idaho? Call Zach at Skinner Customs — (208) 390-5794 — or start at skinner-customs.com

    Content produced in partnership with S4 Media, marketing partner of SwagerBuilds LLC.