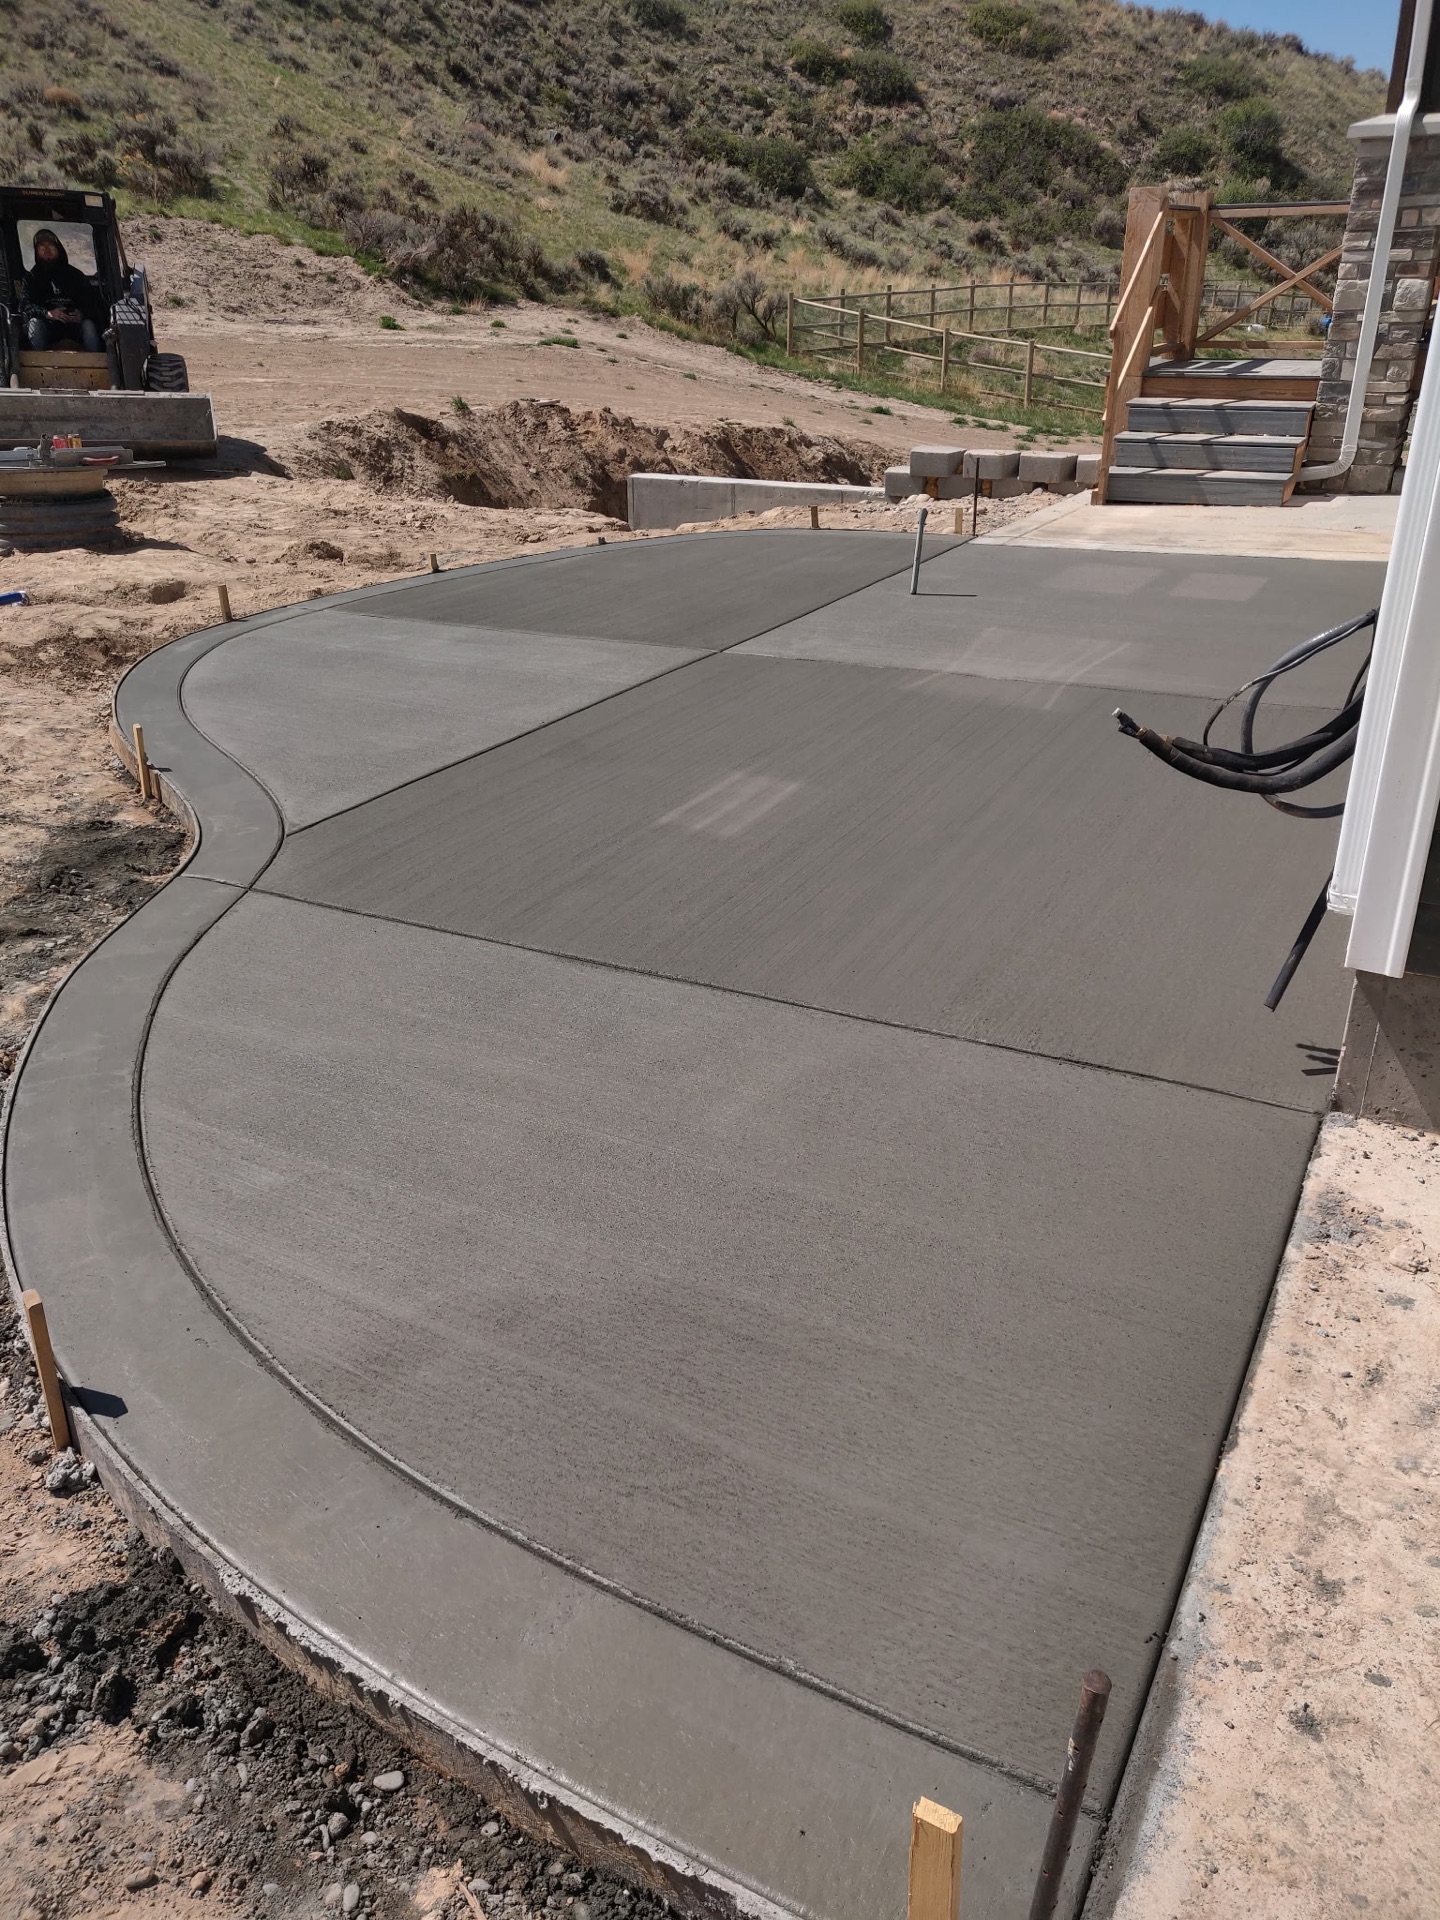
Category: How-To

  • How to Choose a Concrete Contractor in Idaho (Without Getting Burned)

    How to Choose a Concrete Contractor in Idaho (Without Getting Burned)

    Choosing a concrete contractor in Idaho is not hard once you know what you are actually comparing. The trouble is that most homeowners compare the only thing that is easy to compare, which is the number at the bottom of the page. Three bids, three prices, pick the low one. That is how people end up with a cracked slab in year two.

    I run Skinner Customs out of Rigby, and I pour in Idaho Falls, Rexburg, Ammon, and Shelley. I lose bids to guys who quote less than I do, and some of those jobs come back looking for somebody to fix them. Here is how to sort a real contractor from a truck and a screed, before you write a check.

    Step one: confirm they are registered

    Idaho requires contractor registration. Idaho Code 54-5204 states plainly that it is unlawful for any person to engage in the business of, or hold himself out as, a contractor in this state without being registered. That has been the law since January 1, 2006.

    It has teeth. Under Idaho Code 54-5217, working as a contractor without a current registration is a misdemeanor, and an unregistered contractor cannot bring or maintain an action in an Idaho court to collect what he says you owe him unless he proves he was registered the whole time.

    Read that second part again from your side of the table. If the guy is not registered, he is not a bargain, he is a liability. Registration is a floor, not a badge of quality, but nobody clears the rest of this list if they cannot clear that.

    Ask every contractor you are considering for the registration number, mine included, and verify it. Ask for proof of liability insurance and workers compensation in the same breath. A crew working on your property without coverage is a risk that lands on you.

    Step two: make the bids comparable

    Two bids on a 900 square foot driveway can differ by thousands of dollars and both be honest, because they are not describing the same slab. Before you compare price, make every bid state the same seven things:

    • Square footage being poured, and how it was measured
    • Slab thickness in inches
    • Concrete strength in PSI
    • Reinforcement — what, and at what spacing
    • Base prep — material, depth, and whether it is compacted in lifts
    • Joint plan — where control joints go and how they are cut
    • Finish — broom, and what any decorative work adds

    If a bid is one line and a total, it is not a bid, it is a number. Ask for the detail in writing. A contractor who does the work properly will not mind writing down what he is already doing. The one who minds is telling you something.

    Step three: know the four specs that decide the outcome

    You do not need to be a concrete guy. You need to know four things well enough to tell whether the bid in your hand is building something that survives our winters.

    Spec What it should say Why it matters here
    Concrete strength 4,000 PSI minimum Eastern Idaho freeze-thaw cycling is brutal on weak mixes
    Reinforcement Rebar, #3 or #4 on an 18-inch grid Holds the slab together and stays put during the pour
    Base Compacted gravel, 4 inches minimum, multiple lifts on soft soils Uneven support is what cracks slabs, not traffic
    Thickness 4 inches for standard flatwork, more for heavy loads Thin slabs fail under loads they were never built for

    A word on reinforcement specifically. If a bid says wire mesh, that is the shortcut. Mesh lifts out of position when the crew walks the pour, and it ends up sitting on the bottom of the slab where it does nothing. Then you get cracks at the joints and an explanation. Rebar tied on a grid stays where it was placed.

    Step four: use price as a signal, not a decision

    Straight talk on numbers. Four-inch broom-finish flatwork in this area runs $8 to $13 per square foot depending on access, site conditions, and scope. Tear-out and haul-off of an old slab runs $2 to $4 per square foot on top of that. Decorative work — color, stamping, exposed aggregate — adds to the base number.

    Anything under $8 per square foot is not a better deal, it is a different slab. Something got cut to reach that price, and it is one of four things: thinner concrete, mesh instead of rebar, base prep skipped or thinned, or a weaker mix. Sometimes all four.

    The honest version of the low bid conversation is this: ask the cheap bidder which of those four he cut. Most will tell you. That answer is worth more than the discount.

    Step five: the questions that sort people out

    Ask these out loud and listen to how fast the answers come:

    • What PSI mix are you ordering, and why that one?
    • What reinforcement, at what spacing?
    • How deep is the base, and are you compacting it in lifts?
    • Where are the control joints going, and when do you cut them?
    • Who is on site during the pour, and are you here yourself?
    • What is your schedule if weather pushes the pour?
    • What happens if the slab cracks outside a joint in year one?

    Somebody who pours every week answers all seven without thinking. Somebody who does not will get vague, or get annoyed. Both are useful information.

    Step six: watch the paperwork and the payment schedule

    A reasonable job has a written scope, a start window, and a payment structure that follows the work. A large deposit before anything happens is worth questioning. So is a contractor who will only take cash, or who wants the full amount before the pour is finished.

    Get the scope, the specs, and the price in one document you both sign. If you are on a larger project with subcontractors and suppliers involved, ask your contractor how lien releases are handled as payments go out. You are entitled to understand who has been paid on your project.

    What good looks like in Eastern Idaho specifically

    Our climate does the selecting for you over time. A slab in Rigby or Ammon goes through freeze-thaw cycling every winter, sits under snow load, and deals with ground that moves. The contractors who last here are the ones who over-build the base and do not cheat the mix, because everything else gets exposed within a few seasons.

    Local also means something practical: a contractor who works this valley knows which subdivisions have soft fill, what the frost conditions do to a pour schedule in October, and which plants can get a heated mix to your site on short notice. That is not marketing, it is the difference between a pour that goes right and one that gets rescheduled twice.

    Frequently asked questions

    Do concrete contractors have to be licensed in Idaho?

    Idaho requires contractor registration rather than a trade license for this work. Idaho Code 54-5204 makes it unlawful to work as a contractor in the state without being registered, and 54-5217 makes it a misdemeanor and bars an unregistered contractor from suing to collect payment.

    How many bids should I get for concrete work?

    Three is a reasonable number. The value is not in finding the lowest one, it is in seeing where the bids agree and where they do not. When one bid is far below the others, the difference is almost always in thickness, reinforcement, base prep, or mix strength.

    Is the cheapest concrete bid ever the right choice?

    It can be, if it specifies the same slab as the others and the contractor is simply more efficient or closer to your site. It is the wrong choice when the price is low because something was cut. Make the bids describe the same work first, then compare.

    What should be in a written concrete bid?

    Square footage, slab thickness, PSI, reinforcement type and spacing, base material and depth, the joint plan, the finish, and the payment schedule. Anything less and you cannot compare it to another bid.

    How do I check a contractor’s references?

    Ask for addresses of jobs poured two or more years ago, not last month. Fresh concrete looks good in every photo. What you want to see is how it held up through a couple of Eastern Idaho winters.

    Want a bid you can actually read?

    Tell me what you are pouring and where, and I will put the specs in writing so you can hold my number next to anyone else’s and compare the same slab.

    Concrete work in Rigby, Idaho Falls, Rexburg, Ammon, or Shelley? Call Zach at Skinner Customs at (208) 390-5794 or start at skinner-customs.com.


    Content produced in partnership with S4 Media, marketing partner of SwagerBuilds LLC.

  • Concrete vs Asphalt Driveway in Eastern Idaho: An Honest Comparison

    Concrete vs Asphalt Driveway in Eastern Idaho: An Honest Comparison

    I pour concrete for a living, so you already know which way I lean. That is exactly why I want to be straight with you about where asphalt is the better call, because sending somebody down the wrong road costs them more than the driveway did.

    I run Skinner Customs out of Rigby. We do not pour asphalt and I will not put a number on another trade’s work. What I can do is tell you what thirty Eastern Idaho winters do to each surface, what concrete actually costs when it is built right, and how to compare two bids that are not measuring the same thing.

    Start with what our winters do

    Concrete vs asphalt driveway decisions in Eastern Idaho come down to one thing more than any other: we freeze and thaw, over and over, from October into April. Water gets into a surface, freezes, expands, and pries it apart. Then it thaws and does it again next week.

    On top of that we run studded tires, we plow, and we throw salt and deicer around. A driveway here is not sitting in the sun in Phoenix. It is getting worked.

    Those two surfaces fail in completely different ways under that load, and knowing how they fail is most of the decision.

    Asphalt is flexible. It moves with the ground, which is genuinely useful on the expansive and frost-susceptible soils we have all over the valley. But it is held together by a binder that oxidizes and gets brittle with sun and age. Once it cracks, water gets into the base, the base softens, and you get alligator cracking and potholes from the bottom up.

    Concrete is rigid. It does not flex with the ground, which is why base prep and jointing matter so much. But it does not oxidize, it does not soften in July, and studded tires do far less to it.

    Where asphalt genuinely wins

    I am not going to pretend these do not exist.

    Up-front cost. On most residential jobs asphalt bids lower than concrete. That gap is real and for some budgets it is the whole conversation.

    Long rural driveways. If you have a quarter mile from the county road to the house, the math changes hard. That is a lot of square footage, and concrete at that scale gets expensive fast.

    Ground that moves. On a site with known settlement or a soft subgrade you cannot economically fix, a flexible surface tolerates movement that would crack a slab.

    Speed. Asphalt takes traffic in a day or two. Concrete needs to cure before you drive on it.

    Repairs disappear. Patched asphalt blends in after a season. A concrete patch never quite matches, and anybody who tells you otherwise is selling something.

    If two or three of those describe your situation, get an asphalt bid and take it seriously.

    Where concrete wins

    Service life. A properly built concrete driveway outlasts asphalt by a wide margin in this climate. That is the single biggest reason I get called to replace asphalt and almost never the other way around.

    Maintenance cadence. Asphalt wants sealcoating on a repeating schedule for its whole life. Concrete wants sealing far less often, and a good broom finish with sound joints can go years between anything at all.

    Heat. Asphalt softens in direct summer sun. Kickstands, jack stands, and trailer tongues leave marks. Concrete does not care.

    Edges. Asphalt edges crumble where tires run off them, especially without a curb. Concrete holds its edge.

    Looks and options. Broom finish is the standard and it looks clean for decades. If you want color, stamping, or exposed aggregate, that is available on concrete and not on asphalt.

    Resale. In our market, a concrete driveway on a nicer home reads as finished. Asphalt on that same house reads as a placeholder.

    The cost question, answered honestly

    Here is where most comparisons go sideways. People compare the two bids that landed in their inbox and pick the smaller number. That is not a comparison, that is a sticker price.

    The Federal Highway Administration has spent decades on this exact problem for public pavements, and their life-cycle cost analysis guidance says it plainly: the honest way to compare pavement options is initial cost plus all the discounted future costs of maintenance, rehabilitation and resurfacing over the life of the thing, not the initial cost alone. That is a highway framework, and your driveway is not a highway, but the logic transfers exactly.

    So run your own version of it. Take each bid, add up what that surface will ask of you over the next twenty-five years, and compare those totals.

    On the concrete side I can give you our real numbers, because they are ours. A standard four-inch broom-finish driveway runs $8 to $13 per square foot in our area. Each extra inch of thickness adds about $1.50 to $2.50 per square foot. Integral color adds $1.50 to $3. Stamped work runs $14 to $22. If you are replacing existing concrete, tear-out and haul-off is another $2 to $4 per square foot.

    Anything under $8 per square foot for flatwork is a warning, not a deal. At that price something got cut, and it is usually the base prep, the thickness, or the steel.

    On the asphalt side, get a bid from a paving contractor. I am not going to quote another trade’s pricing and neither should anybody else bidding your job.

    What actually makes a concrete driveway last

    If you go concrete, the bid matters less than what is in it. Here is what we build and what you should be asking any contractor to put in writing.

    • 4,000 PSI minimum. Our freeze-thaw cycling is hard on concrete. Lower mixes save the contractor money and cost you years.
    • Rebar, #3 or #4 on an 18-inch grid. Not wire mesh. Mesh lifts out of position during the pour and ends up sitting in the bottom of the slab doing nothing, which is how you get cracking at the joints.
    • Four inches of compacted gravel base, minimum. More lifts on questionable soils. The base is the part nobody sees and the part that decides everything.
    • Four inches of slab for cars, thicker where trucks and trailers park.
    • Control joints cut on a real spacing plan. Concrete cracks. Joints decide where.
    • Broom finish as the standard surface. It sheds water, it grips in ice, and it holds up.

    A bid that does not specify PSI, reinforcement, base depth and joint spacing is not a bid. It is a number.

    How to decide in five minutes

    Answer these honestly.

    1. Is this driveway longer than a couple hundred feet? Asphalt gets more attractive with every foot.
    2. Do you know the ground moves here? Flexible wins.
    3. Is the budget hard-capped below what a properly built slab costs? Take the asphalt bid rather than a cheap slab. A bad concrete driveway is worse than a good asphalt one.
    4. Do you plan to be in this house in twenty years? That is a concrete answer.
    5. Do you want color, stamping, or a finish that matches the house? Concrete is the only one of the two that does that.

    Frequently asked questions

    Is a concrete driveway worth the extra cost in Idaho?
    For a normal residential driveway you intend to keep, usually yes, because of service life and a much lighter maintenance schedule. For a long rural driveway or a hard budget cap, asphalt can be the better decision.

    Can you pour concrete over an existing asphalt driveway?
    I would not. Asphalt flexes and concrete does not, so the slab ends up with an unstable base under it. Tear it out and build a proper compacted gravel base.

    How thick should a concrete driveway be?
    Four inches over a compacted base for cars and light trucks. Thicker where you regularly park loaded trucks, RVs or trailers. Tell your contractor what will actually sit on it.

    Does deicer damage a concrete driveway?
    It can, especially on young concrete and especially products containing ammonium or magnesium chloride. Let a new slab go through its first winter without deicer, and after that use it sparingly and rinse in the spring.

    Which one handles snow plowing better?
    Concrete, by a lot. Plow blades and asphalt edges are a bad combination, particularly on driveways without a curb.

    Get a real number for your driveway

    Send me the dimensions, what parks on it, and what the ground is doing out there, and I will tell you straight whether concrete makes sense for your situation or whether you should be calling a paving contractor.

    Need concrete work in Eastern Idaho? Call Zach at Skinner Customs at (208) 390-5794 or start at skinner-customs.com.


    Content produced in partnership with S4 Media, marketing partner of SwagerBuilds LLC.

  • How to Fix a Cracked Concrete Driveway (and When Not to Bother)

    How to Fix a Cracked Concrete Driveway (and When Not to Bother)

    Before you can fix a cracked concrete driveway, you have to read the crack. Most driveway cracks around here are shrinkage cracks, and they are cosmetic. A smaller number are structural, and no filler or sealer will fix those. Telling the two apart takes about five minutes and saves people thousands of dollars every year in both directions.

    I run Skinner Customs out of Rigby. Every spring I walk driveways in Rigby, Idaho Falls, Ammon, and Rexburg that came through a winter looking rough, and the honest answer is often that the slab is fine and the owner should leave it alone.

    Read the crack first

    Four things tell you what you are looking at.

    Width. Under about an eighth of an inch is hairline. An eighth to a quarter is worth sealing. Wider than a quarter inch is a real movement crack.

    Offset. Put your foot across the crack. If one side sits higher than the other, the slab has moved, which means the ground under it moved. That is a base problem, not a concrete problem.

    Pattern. A single crack running from a corner or between two joints is shrinkage doing what shrinkage does. A network of cracks across the middle of a panel means the slab is failing structurally.

    Movement over time. Mark both ends with a pencil and a date. A crack that has not grown in a year is stable. One that lengthens every season is telling you something is still moving underneath.

    What causes them in the first place

    The National Ready Mixed Concrete Association’s bulletin CIP 4, Cracking Concrete Surfaces puts the usual causes plainly: omitted isolation and contraction joints and improper jointing practices, high slump concrete, poor finishing, rapid moisture loss at the surface, and inadequate curing. It also notes that most early random cracks are unsightly rather than structural, with two exceptions worth knowing: D-cracking, which is freeze-thaw deterioration, and alkali-aggregate reaction, which both cause long-term structural damage.

    Its jointing numbers are the ones I work to: contraction joints cut about a quarter to a third of the slab thickness deep, spaced 24 to 36 times the slab thickness with a maximum around 15 feet, and panels no longer than about one and a half times their width. Most cracked driveways I look at around here were jointed at 20 feet or more, or in long skinny panels, or not jointed at all.

    Add our climate on top. Concrete that was salted its first winter, or poured thin over uncompacted fill, does not need much help to crack.

    Cracks you can handle yourself

    If the crack is narrow, stable, has no offset, and the slab around it is sound, it is maintenance and not a repair job.

    1. Clean it out. A wire brush, a screwdriver or utility knife to dig out debris, and a shop vac or a hose. Anything loose in the crack keeps the filler from bonding.
    2. Let it dry completely. A damp crack fails within a season.
    3. Fill it. A gray polyurethane or self-leveling concrete crack sealant from any hardware store works for cracks up to about a half inch. Backer rod first if the crack is deep. Overfill slightly; these products settle.
    4. Stay off it until the product’s cure time is up, and keep it out of standing water that first week.

    Do not use a thin cementitious patching compound on a moving crack. It has no flex, and it will crack again in the same line by spring.

    The real reason to seal is not looks. It is keeping water out. Water in a crack freezes, expands, and widens the crack every cycle. Around here that runs dozens of times a winter.

    Cracks that need concrete work

    Call somebody when you see any of these:

    • Vertical offset you can catch a toe or a plow blade on
    • Cracks wider than about a quarter inch that are still growing
    • A panel broken into pieces smaller than roughly three feet across
    • Surface scaling or spalling over a large area, where the top layer flakes off and leaves aggregate exposed
    • A corner or edge that has settled and holds water against the garage or the house

    The first four are the slab. The fifth is usually drainage, and fixing the drainage matters more than fixing the concrete, because if water is still getting under the slab, the new concrete has the same future as the old.

    When it is one or two bad panels and the rest of the drive is sound, cutting those panels out at the joints and repouring them costs a fraction of replacing everything. Expect a visible color difference between the new panels and 20-year-old concrete. It fades but never disappears.

    When the whole slab is broken up, scaling widely, or too thin for what you park on it, replacement is the honest answer. Replacement in this area runs $10 to $17 per square foot with the old slab removed and hauled, of which tear-out is $2 to $4.

    Do not let the new one go the same way

    Whether you are repairing or replacing, the reasons driveways fail here do not change:

    • 4,000 PSI air-entrained mix. Non-negotiable in freeze-thaw country.
    • #3 or #4 rebar on an 18-inch grid. Not wire mesh, which sinks to the bottom of the pour and does nothing.
    • At least 4 inches of compacted gravel base, placed in lifts, more on soft or irrigated ground.
    • Joints planned before the pour, cut on time, at the spacing above.
    • Real curing and no deicers the first winter. Sand for traction instead. CIP 4 calls for keeping the surface moist at least three days.

    Frequently asked questions

    Are hairline cracks in a concrete driveway normal?

    Yes. Concrete shrinks as it cures and it cracks somewhere. Joints are there to control where. Hairline cracks with no offset are not a defect.

    Should I seal cracks before winter?

    Yes. Sealing in fall keeps water out through the freeze-thaw season, which is when a small crack becomes a big one.

    What is the best filler for a concrete driveway crack?

    For cracks up to about half an inch, a self-leveling polyurethane crack sealant. Rigid patching compounds crack again because they cannot move with the slab.

    Can a cracked driveway be resurfaced instead of replaced?

    An overlay only works over a slab that is structurally sound. Over a slab that is cracked through or moving, an overlay cracks along the same lines within a year or two.

    Why did my driveway crack the first year?

    Usually jointing that was too far apart or cut too late, a wet mix, or moisture lost from the surface before curing started. All four are placement issues, not homeowner issues.

    Does repairing a crack stop it from spreading?

    Sealing stops water from driving it. If the cause is settlement under the slab, sealing buys time and nothing more.

    Not sure which one you have

    Send photos of the driveway, a close-up of the worst crack with something in frame for scale, and a note on whether one side sits higher than the other. I will tell you whether it is maintenance, a couple of panels, or a replacement. If it is maintenance, I will tell you that too.

    Need concrete work in Eastern Idaho? Call Zach at Skinner Customs at (208) 390-5794 or start at skinner-customs.com.


    Content produced in partnership with S4 Media, marketing partner of SwagerBuilds LLC.
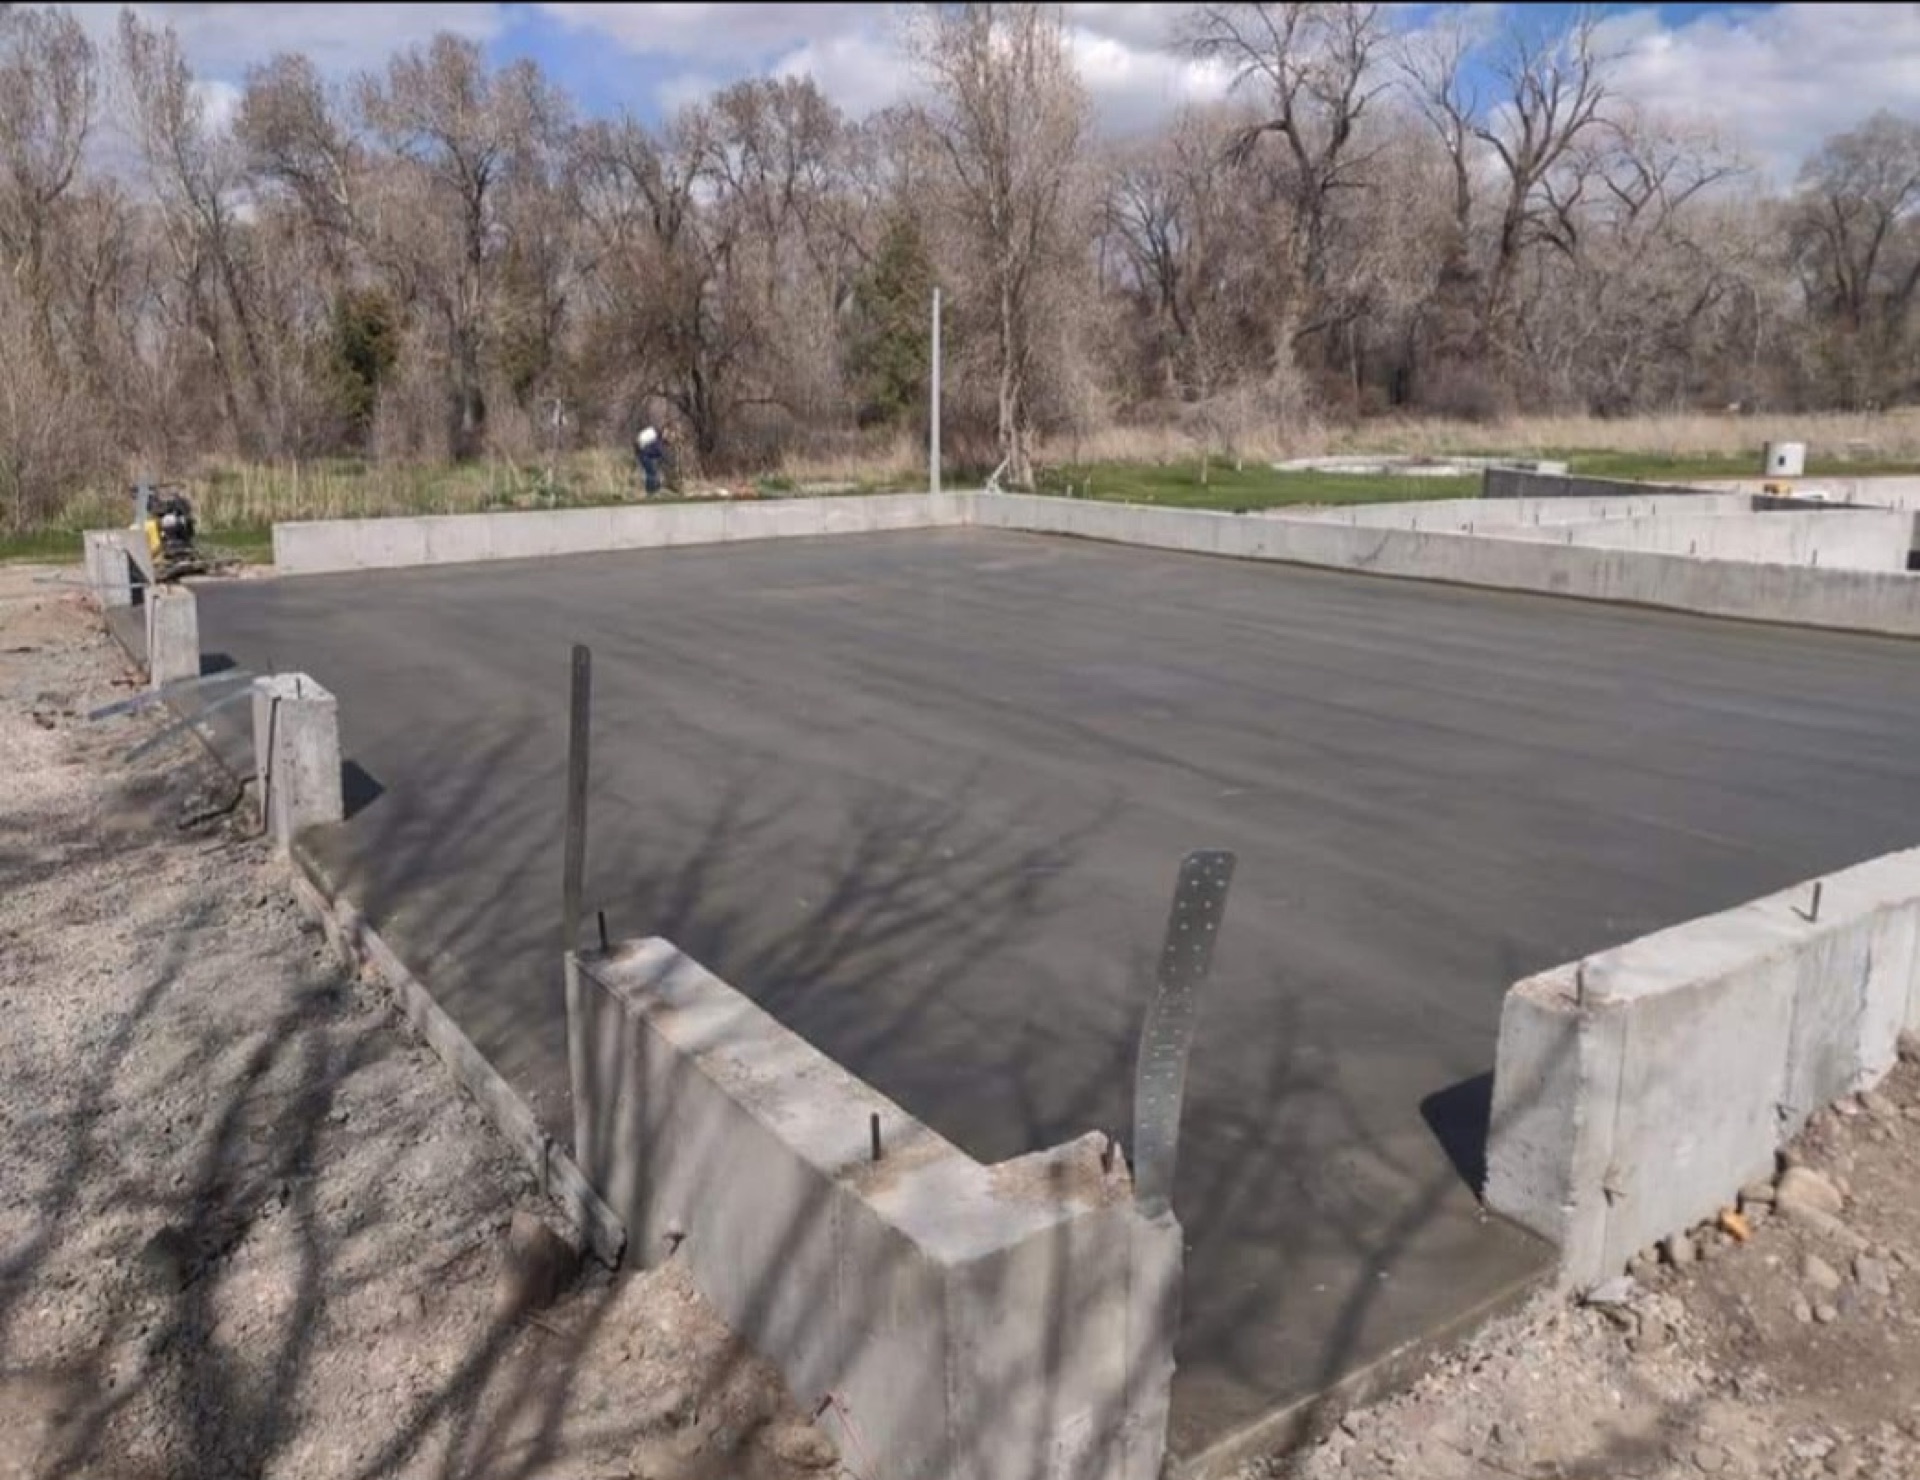
  • Concrete Slab Thickness for a Shop: 4, 5, or 6 Inches (Eastern Idaho)

    Concrete Slab Thickness for a Shop: 4, 5, or 6 Inches (Eastern Idaho)

    The right concrete slab thickness for a shop is 5 inches for most residential shops in Eastern Idaho, 6 inches if a tractor, skid steer, or loaded trailer is going to live on it, and 4 inches only if the building is really a garage for cars and storage. Every extra inch adds about $1.50 to $2.50 per square foot.

    I run Skinner Customs out of Rigby, and this is the question I get asked wrong more than any other. People ask how thick the slab should be for a 40 x 60. Square footage has nothing to do with it. Thickness is a load question.

    Thickness is decided by what rolls across it

    A slab on ground is a structural element sitting on dirt. It carries whatever you put on it and transfers that load into the base underneath. The American Concrete Institute’s Guide to Design of Slabs-on-Ground (ACI 360R-10) sorts the loads a slab has to handle into a short list: material stored directly on the slab, storage rack loads, and the static and dynamic loads that come with equipment and vehicles. Thickness, reinforcement, and the support under the slab all get designed around those loads, not around the building footprint.

    That is the whole logic. A 24 x 30 shop with a skid steer in it needs a thicker slab than a 40 x 60 that holds a lawn mower and a workbench.

    Two loads matter more than people expect:

    • Point loads. A two-post lift, jack stands, a trailer tongue jack, or an outrigger puts thousands of pounds on a few square inches. That is much harder on a slab than a truck’s weight spread across four tires.
    • Dynamic loads. A loaded trailer bouncing across a joint hits harder than the same trailer parked. Impact is why shop slabs fail at joints and edges first.

    The thickness ladder

    4 inches. Cars, half-ton pickups, storage, a workbench, a bike lift. This is a garage floor. It is the standard residential flatwork thickness and it is fine for what it is built for.

    5 inches. Three-quarter-ton and one-ton trucks, an ATV and trailer, a car lift with a light vehicle, general hobby-shop use. This is the honest minimum for most shops around here.

    6 inches. Tractors, skid steers, loaded tandem trailers, dually trucks, a two-post lift with something heavy on it. Most working shops in Rigby, Idaho Falls, Rexburg, and Ammon belong here.

    8 inches with engineered reinforcement. Semi traffic, heavy equipment, commercial use. At that point you need an engineer’s number, not a contractor’s rule of thumb. I will tell you that rather than guess.

    If you are between two numbers, go thicker. The cost of one more inch is small money compared to cutting out a failed slab inside a finished building, where everything has to come out through a man door by hand.

    What the extra inch costs

    At $1.50 to $2.50 per square foot per inch, here is what a step up actually runs:

    Shop size Square footage 4″ to 5″ 5″ to 6″ 4″ to 6″
    24 x 30 720 sq ft $1,080 – $1,800 $1,080 – $1,800 $2,160 – $3,600
    30 x 40 1,200 sq ft $1,800 – $3,000 $1,800 – $3,000 $3,600 – $6,000
    40 x 60 2,400 sq ft $3,600 – $6,000 $3,600 – $6,000 $7,200 – $12,000
    50 x 80 4,000 sq ft $6,000 – $10,000 $6,000 – $10,000 $12,000 – $20,000

    Our flatwork pricing starts at $8 per square foot and shop slabs run above that, because of the thickness, the reinforcement, and the base work underneath. A shop slab bid below that number means something came out, and it is usually the part you cannot see.

    What thickness cannot fix

    This is the part worth reading twice. A thick slab on a bad base is still a bad slab.

    Base prep. Minimum 4 inches of compacted gravel, placed and compacted in lifts, deeper on soft ground. A lot of building sites around here are old farm ground with irrigation history and uneven fill. Concrete does not span voids. It cracks into them.

    Reinforcement. Every slab we pour gets #4 rebar on an 18-inch grid, chaired up off the base so it stays at the right height. Wire mesh is the low-bid shortcut. It is supposed to sit mid-slab, and in practice it gets walked to the bottom of the pour during placement and does nothing at all.

    Joints. Contraction joints get cut within the first 6 to 18 hours depending on weather, at a depth of at least a quarter of the slab thickness, spaced roughly 24 to 36 times the thickness in inches and never more than about 15 feet apart. On a 6-inch slab that is joints every 12 to 15 feet. Panels should stay close to square. Cut them late and the slab already cracked where it wanted to.

    Thickened edges and footings. The slab edge under a post-frame or stud wall is structural. It has to be detailed for the building and for local frost requirements, and your county building department sets that depth. In much of Eastern Idaho you are designing around 30-plus inches. Confirm it before anyone digs.

    Mix. 4,000 PSI minimum in this climate, air entrained. Freeze-thaw does not care how thick the slab is if the concrete itself is weak.

    Expect some cracks, and know which ones matter

    Straight from ACI 360R-10: it is unrealistic to expect crack-free and curl-free floors. That is the industry’s own guide saying it. A slab is a large piece of concrete that shrinks as it cures, and the job of the joints is to tell it where to crack.

    What you should not accept: cracks with vertical offset between the two sides, a grid of cracks across the middle of a panel, or edges that break down under traffic. Those are base, reinforcement, or thickness problems, not shrinkage.

    Pour it once

    If there is any chance you want heat in the floor, run the PEX before the pour. Tubing adds roughly $3 to $6 per square foot at pour time. Retrofitting heat into a finished shop means an overlay or a tear-out.

    Same logic on slope. A quarter inch per foot toward the overhead door means the snowmelt off your truck runs out instead of standing at the back wall. Free when it is planned, impossible to add afterward.

    Frequently asked questions

    How thick should a concrete slab be for a shop?

    Five inches for a residential shop with trucks and a lift, six inches if a tractor, skid steer, or loaded trailer will be on it. Four inches is a garage floor, not a shop floor.

    Is a 4-inch slab ever enough for a pole barn?

    For cold storage, a mower, and light vehicles, yes. For anything with a bucket or tracks on it, no.

    Does a thicker slab crack less?

    It helps, but jointing, base prep, and curing control cracking far more than thickness does. A 6-inch slab with no joints cracks on its own schedule.

    How far apart should joints be on a 6-inch slab?

    Roughly 12 to 15 feet, cut at least an inch and a half deep, with panels kept close to square.

    Can I pour a slab inside a building that is already up?

    Yes, and we do it regularly. It costs more per square foot because the truck cannot reach the pour, so there is pumping and more hand work involved.

    What PSI should a shop slab be?

    4,000 minimum here. For heavy equipment traffic, higher.

    Get a real number

    Send the building dimensions, what you plan to drive on it or park in it, and a photo of the site. I will tell you what thickness the slab actually needs and what it costs, including the base work.

    Need concrete work in Eastern Idaho? Call Zach at Skinner Customs at (208) 390-5794 or start at skinner-customs.com.


    Content produced in partnership with S4 Media, marketing partner of SwagerBuilds LLC.
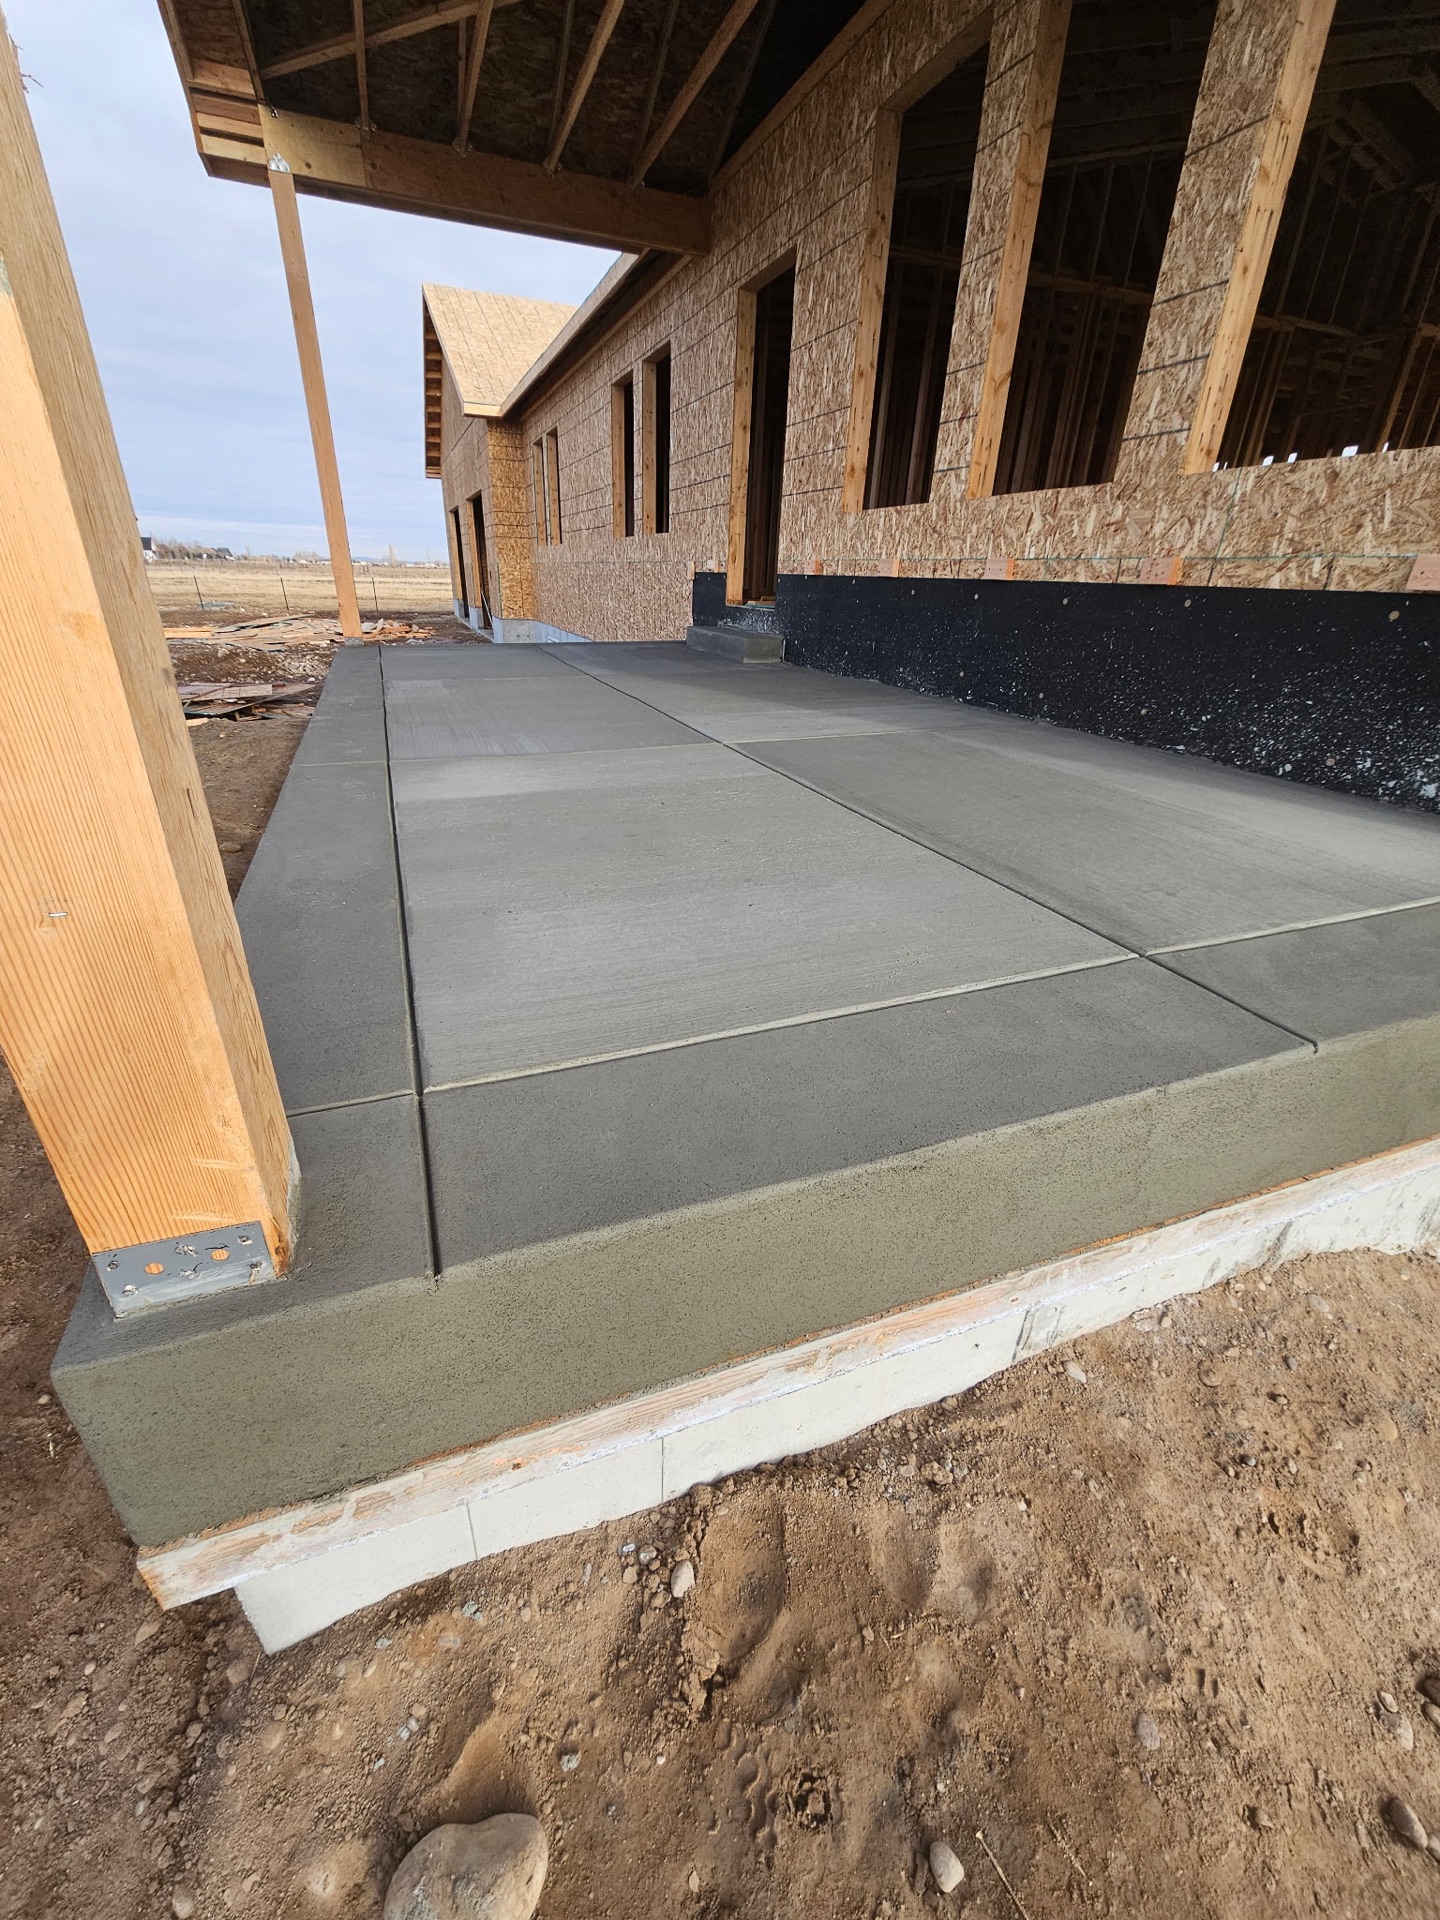
  • Cold Weather Concrete Curing in Idaho: What Has to Happen After the Truck Leaves

    Cold Weather Concrete Curing in Idaho: What Has to Happen After the Truck Leaves

    Cold weather concrete curing in Idaho is the part of a winter pour that decides everything, and it is the part nobody watches. The truck leaves, the crew leaves, the slab looks done. What happens over the next 48 hours is what separates a slab that lasts from one that is compromised before it ever carries a load.

    I run Skinner Customs out of Rigby. We pour into the cold season when a job needs it. This is what that actually involves, so you know what you are buying and what to ask for.

    The number that matters: 500 psi

    Fresh concrete is mostly water, and water expands when it freezes. If it freezes inside a slab that has not developed any strength yet, the ice pushes the cement paste apart. The internal structure is damaged, and warming back up does not undo it. You have permanently lost strength and durability in a slab you will look at for thirty years.

    NRMCA’s CIP 27, Cold Weather Concreting puts the threshold plainly: concrete must be protected from freezing until it reaches a compressive strength of 500 psi, which is roughly two days after placement. After that, the early freeze risk is behind you — but the slab still needs protecting from repeated freeze-thaw cycling until it is much stronger, on the order of 3,500 psi.

    Two days of real protection. That is the commitment a winter pour makes.

    What counts as cold weather

    It is not a thermometer reading on pour day. NRMCA defines cold weather concreting as a period where, for more than three consecutive days, the average daily temperature stays below 40°F and the air temperature does not exceed 50°F for more than half of any 24-hour period.

    By that definition, most of November through March in Rigby, Idaho Falls, and Rexburg is cold weather concreting. Our valley also swings hard between day and night, so an afternoon in the high 40s can still be a hard freeze by 2 a.m. The overnight low is what plans the pour, not the daytime high.

    Placement temperature, before curing ever starts

    Curing starts with what comes out of the truck. CIP 27 sets minimum concrete temperature as placed by section thickness:

    Section thickness Minimum concrete temperature as placed
    Less than 12 inches 55°F
    12 to 36 inches 50°F
    36 to 72 inches 45°F

    Almost all residential flatwork — driveways, patios, garage floors, shop slabs — falls in that first row. That means the mix needs to arrive at 55°F or better, which usually means heated mix water from the plant, and that gets arranged in advance.

    The base matters as much as the mix. We do not place on frozen ground, snow, or ice. Frozen subgrade thaws later and takes the slab down with it, and snow trapped under fresh concrete becomes a void. The ground gets thawed and cleared first, which on a cold site can mean blankets or heat on the subgrade the day before.

    How the slab actually gets protected

    Insulated blankets. The workhorse. Concrete curing generates its own heat, and blankets trap it. They go on as soon as the surface will take them without marring, and they stay on continuously. Edges and corners lose heat fastest and get extra attention — a corner that freezes while the middle is fine still ruins the corner.

    Straw under plastic. An older method that still works when blankets are short, as long as the plastic is sealed against wind.

    Enclosures and heat. For foundation walls, deep sections, or a very cold stretch, a tarped enclosure with heaters. If a fuel-fired heater is used inside an enclosure it has to be vented — unvented combustion puts carbon dioxide into the air and carbonates the fresh surface, leaving a soft, dusting slab.

    Accelerating admixtures. ASTM C 494 Type C and Type E accelerators speed early strength gain so the slab clears 500 psi sooner. Calcium chloride is one option, dosed no higher than 2 percent by weight of cement. It is worth knowing that chlorides are a concern where steel is close to the surface, so this is a mix decision, not a default.

    An accelerator is not a substitute for protection. It shortens the exposure window. It does not remove it.

    Coming off protection without shocking the slab

    The end of the protection period is its own step. Pulling blankets off a warm slab into 15°F air drops the surface temperature fast while the core is still warm, and that differential cracks the surface.

    NRMCA’s curing guidance (CIP 11, Curing In-Place Concrete) holds the cooling rate to no more than 5°F per hour in the first 24 hours, and calls for keeping concrete above 50°F during curing. In practice that means peeling protection back gradually, and picking the warm part of the day to do it.

    CIP 11 also makes the broader point worth hearing: concrete left to cure in a dry environment can lose as much as 50 percent of its potential strength compared with concrete that is properly cured. Curing is not a formality on any pour, cold or not.

    What to ask before you sign a winter bid

    A winter pour done right costs more than a July pour, because it is more work. If the price is the same, the protection is missing.

    Ask these:

    • Will the mix be delivered heated, and what placement temperature are you targeting?
    • How will the subgrade be thawed and cleared?
    • What protection goes on, and how long does it stay?
    • Is anyone coming back to check it overnight or the next day?
    • Is an accelerator being used, and which type?
    • How does the protection come off?

    A contractor who pours through winter regularly will answer all six without hesitating. Those answers should also appear as real line items on the bid, not be folded invisibly into a square-foot number.

    When waiting is the better call

    Sometimes the right answer is spring. If there is no deadline, no building going up over it, and no reason the slab has to exist in January, waiting for a normal-condition pour is cheaper and simpler.

    Where a winter pour earns its keep: an interior slab inside a building that can be closed and heated, a foundation on a build with a schedule behind it, or a shop floor that has to be in before equipment arrives. Those are real reasons. “It’s cheaper in the off-season” is not one — done properly, it is not cheaper.

    Frequently asked questions

    How long does concrete need to be protected from freezing? Until it reaches about 500 psi compressive strength, roughly two days after placement. Protection from repeated freeze-thaw cycling continues until the concrete is much stronger.

    What temperature should concrete be when it is placed in cold weather? For sections under 12 inches, which covers most residential flatwork, a minimum of 55°F as placed. Thicker sections can be placed cooler.

    Can concrete be poured on frozen ground? No. Frozen subgrade thaws later and the slab settles into it. The ground must be thawed and free of snow and ice before placing.

    Do concrete blankets really work? Yes. Concrete generates heat as it cures, and insulated blankets hold it in. They need full, continuous coverage — edges and corners lose heat first and are where cold weather damage usually shows up.

    Does concrete poured in winter take longer to cure? Strength gain is slower in the cold, so the slab stays weak longer and protection has to last longer. Expect longer waits before driving on it or loading it.

    Not sure whether to pour now or wait?

    Tell me what the slab is for and what your deadline actually is, and I will tell you straight whether it is worth pouring this winter or whether spring is the smarter money.

    Need concrete work in Eastern Idaho? Call Zach at Skinner Customs at (208) 390-5794 or start at skinner-customs.com.


    Content produced in partnership with S4 Media, marketing partner of SwagerBuilds LLC.

  • Best Time of Year to Pour Concrete in Eastern Idaho (and When to Wait)

    Best Time of Year to Pour Concrete in Eastern Idaho (and When to Wait)

    The best time of year to pour concrete in Eastern Idaho is late spring through early fall — roughly late May into early October, depending on the year. That is the honest answer. The more useful answer is what each season actually does to the slab, because a pour outside that window is not automatically a bad pour. It is a pour with more steps, and you should know what those steps are before you sign anything.

    I run Skinner Customs out of Rigby. We pour year-round when the job calls for it. Here is how I think about the calendar.

    Why the calendar matters at all

    Concrete does not dry. It hydrates — a chemical reaction between cement and water that keeps building strength for weeks. Temperature controls the speed of that reaction at both ends.

    Too cold and the reaction slows to a crawl. If the water in fresh concrete actually freezes before the slab has any strength, ice crystals push the paste apart and you permanently lose strength and durability. That damage does not heal when it warms up.

    Too hot and the opposite problem shows up. The mix sets faster than the crew can finish it, water leaves the surface faster than it can be replaced, and you get plastic shrinkage cracking and a weaker surface.

    Both ends are manageable. Neither is free.

    Season by season in our valley

    Spring: good, once the ground is right

    Late spring is a strong window. Daytime temperatures are workable, nights are past hard freezes, and the concrete is not fighting July sun.

    The catch is the ground. Our frost comes out slowly, and saturated subgrade is a bad foundation for anything. You cannot compact a base properly when it is soupy, and a slab placed over a base that compacts itself later settles. Early spring jobs often wait on the ground, not the air.

    If the site holds spring runoff, that is a drainage conversation before it is a concrete conversation.

    Summer: the reliable window, with an early alarm

    June through August is the most predictable stretch of the year, which is why everyone books it. It is also when the crew starts earliest.

    On a hot, dry, windy afternoon — which describes a lot of Eastern Idaho summer days — water evaporates off the surface faster than the mix can bleed it back. That is where plastic shrinkage cracks come from. NRMCA’s guidance on hot weather (CIP 12, Hot Weather Concreting) lays out the combination that causes it: high air temperature, high concrete temperature, low humidity, wind, and sun. Their setting-time chart shows initial set dropping from roughly twelve hours at 40°F to about two hours at 120°F, which is exactly why finishing gets frantic.

    What we do about it: early starts, sunshades or windbreaks when it is bad, and curing that starts immediately instead of at the end of the day. What you should not accept is a crew adding water at the truck to make a stiffening mix easier to work. That waters down the strength you paid for.

    Our dry air is the real issue here, more than the temperature number itself. Ninety degrees at twelve percent humidity with a breeze is harder on a slab than ninety in a humid climate.

    Fall: the sweet spot, with a closing door

    September and early October are, in my opinion, the best pouring conditions we get. Air is cool enough that the mix is not racing, the ground is dry and compacts well, and the sun is off the aggressive setting.

    The door closes on the back end. Once overnight lows start touching freezing, every pour carries protection. Fall is also when everyone who put it off all summer calls at once, so the schedule is the constraint more than the weather is.

    If you want concrete this year and it is already September, call now rather than in three weeks.

    Winter: possible, protected, and more expensive

    We pour in winter. It is a real thing contractors do, and done right the slab is fine. It is not a corner-cutting season.

    NRMCA defines cold weather concreting as a stretch where, for more than three consecutive days, the average daily temperature is below 40°F and the air does not top 50°F for more than half of any 24-hour period (CIP 27, Cold Weather Concreting). In that condition, a slab under twelve inches thick should be placed at a minimum of 55°F, and the concrete has to be protected from freezing until it reaches about 500 psi — roughly two days after placement. It then needs protection from freeze-thaw cycling until it is considerably stronger.

    In practice that means heated mix water, accelerating admixture, insulated blankets, sometimes an enclosure, and a crew coming back to check it. All of that is labor and material, and it belongs on your bid as a visible line item. Ask for it that way. A winter bid identical to a July bid means someone is planning to skip the protection.

    What we will not do is pour onto frozen ground or onto snow and ice. The base has to be thawed and clear. That is not negotiable, because a slab placed on frozen subgrade settles when the ground thaws underneath it.

    What actually decides your timing

    Season is one input. These usually matter more:

    Is the site ready? Drainage sorted, utilities located, grade established, access clear. A perfect August week does you no good if the subgrade is wrong.

    Is the schedule real? The best crews are booked out in the good months. Booking a strong contractor for October beats getting a weak one in June.

    Does the project have a hard deadline? A garage floor before winter storage, a shop slab before a building goes up, a driveway before a move-in date. A deadline can justify a protected pour, and that is a legitimate reason to pour in November.

    Is it interior or exterior? Inside a building that can be heated and closed up, winter matters a lot less. Outdoor flatwork exposed to the weather is where the calendar bites.

    The short version

    • Late May through early October: normal conditions, normal process, best value.
    • September into early October: my pick, if the schedule allows it.
    • Deep summer: fine, with early starts and real curing.
    • Early spring: wait for the ground, not the thermometer.
    • November through March: doable with protection, priced accordingly, and never on frozen ground.

    Frequently asked questions

    What is the best month to pour concrete in Eastern Idaho? September is usually the best combination of cool air, dry ground, and workable finishing conditions. Late May through early October is the broader good window.

    Can you pour concrete in winter in Idaho? Yes, with cold weather measures: heated mix water, accelerators, insulated blankets or an enclosure, and protection until the slab reaches adequate strength. The base must be thawed and free of snow and ice.

    How cold is too cold to pour concrete? There is no single cutoff. NRMCA treats it as cold weather concreting when the average daily temperature stays below 40°F for more than three consecutive days. Below that, protection measures are required, not optional.

    Does concrete poured in cold weather end up weaker? Not if it is protected properly. It is weaker permanently if it freezes before reaching about 500 psi, which is why the protection period exists.

    Is it more expensive to pour concrete in the winter? Yes. Heated water, admixtures, blankets or enclosures, and extra site visits all cost money. Expect to see it on the bid.

    Get on the schedule before the door closes

    Send the dimensions, what the slab is for, and your timeline, and I will tell you straight whether it should go in this fall or wait for spring.

    Need concrete work in Eastern Idaho? Call Zach at Skinner Customs at (208) 390-5794 or start at skinner-customs.com.


    Content produced in partnership with S4 Media, marketing partner of SwagerBuilds LLC.

  • How to Prep for a Concrete Pour in Idaho: The Week Before Matters More Than the Day Of

    How to Prep for a Concrete Pour in Idaho: The Week Before Matters More Than the Day Of

    Knowing how to prep for a concrete pour in Idaho is most of the job. The truck shows up, eight yards go down, and four hours later it looks finished. What decides whether that slab is still tight in thirty years happened in the week before the truck ever rolled.

    I run Skinner Customs out of Rigby, and I pour flatwork and foundations across Jefferson, Bonneville, and Madison counties. This is what actually goes into prep, what I need from you as the homeowner, and where I see people lose the most money.

    Start with drainage, not concrete

    Before anything else, figure out where water goes. Our soils around Rigby and Shelley hold water in spring, and a slab that sits in a low spot will move.

    Concrete should slope away from the house. A quarter inch of fall per foot is the working number for a patio or a driveway apron. On a 20-foot driveway that is five inches of drop, and you have to plan for it in the grading, not discover it after the forms are set.

    Walk the area after a heavy rain or during spring melt. If water stands there now, it will stand on your new slab. That gets fixed with grading, a French drain, or a different location — but it gets fixed first.

    Locate utilities before anything gets dug

    Call 811 before any digging. In Idaho that is Dig Line, and the locate is free. Idaho requires notice at least two business days before excavation, so it goes on the calendar early rather than the morning we want to dig.

    811 marks public utilities up to the meter. It does not mark private lines you or a previous owner ran: sprinkler mainlines, landscape lighting, gas to a shop or a fire pit, a well line, a septic lateral. If you know where those are, mark them or tell me. If you do not, we probe.

    Cutting a sprinkler line is a nuisance. Cutting a gas line is a very different day.

    The base is where the slab is won or lost

    Here is where the corners get cut on cheap bids, and here is where the failures come from.

    Strip the organics. Sod, topsoil, roots, and old fill all have to come out. Organic material decomposes and compresses, and the slab settles into the void.

    Compacted gravel base, four inches minimum. On soft or questionable soil, more, placed in lifts and compacted each lift. One deep dump of gravel run over once with a plate compactor is not compaction. It has to be built up in layers.

    Uniform support. A slab spanning a soft pocket next to a hard pocket cracks over the transition. Uniform matters more than hard.

    NRMCA’s guidance on slab support (CIP 29, Vapor Retarders Under Slabs on Grade) calls for a uniformly compacted subgrade with a well-draining, stable base material, and specifically warns off clay and organics in that layer. It also covers where a capillary break belongs and how a vapor retarder gets lapped and sealed.

    Vapor retarder where it belongs. Under a heated interior slab, or anything getting a moisture-sensitive floor covering later, you want a vapor retarder — 10 mils minimum, seams lapped six inches and sealed. On an outdoor patio or a driveway it is not needed.

    If a bid does not tell you how deep the base is and how it gets compacted, that is the number to ask about.

    Forms, grade, and the shape of the finished slab

    Forms set the elevation, the edges, and the fall. They get staked solid, because eight yards of wet concrete pushes hard, and a form that bows leaves a wave you live with permanently.

    Thickness gets set here too. Four inches is standard flatwork for patios and walks. Driveways and anything taking a truck or a trailer go thicker. Adding an inch adds cost across the whole pour, so it is decided before the forms go in, not the morning of.

    Expansion joint material goes in wherever the new slab meets the house, an existing slab, a garage floor, or a post footing. Concrete moves with temperature, and in our climate it moves a lot. It needs somewhere to do that besides against your foundation.

    Rebar, and why I will not use wire mesh

    Every slab we pour gets rebar. Number three or number four, on an eighteen-inch grid, chaired up so it sits in the middle third of the slab.

    Wire mesh is the shortcut. It gets rolled out, it gets walked on during the pour, and it ends up lying on the base doing nothing. Once it is on the bottom it is not holding anything together. Rebar tied and chaired stays where it is supposed to be.

    Rebar does not stop concrete from cracking. Nothing does. What it does is hold the crack tight so it stays a hairline instead of opening into two pieces at different elevations.

    What I need from you before pour day

    Access. A concrete truck is roughly 70,000 pounds loaded. It needs a route in and room to turn. Move vehicles, trailers, and boats the night before. If access is tight, we talk about a pump, and that is decided in advance.

    Water and power. A spigot and an outlet within reach.

    Gates and pets. Gates unlocked or open, dogs inside. Fresh concrete and a curious dog go together badly.

    Overhead clearance. Low branches and power lines over the pour area get sorted out before the truck arrives, not while it is idling.

    Decisions made. Finish, color, saw cut layout, where a future hot tub or post might land. Changing your mind at 7 a.m. on pour day costs real money.

    Timing it for our climate

    Concrete is a chemical reaction, and temperature drives it.

    Spring and fall are the best pouring windows in Eastern Idaho. Mid-summer afternoons set fast and need earlier starts and attention to curing. Once nights run below freezing, the pour needs protection, which is a real line item and a real conversation.

    Plan on the schedule sliding. Weather moves pours. A contractor who promises an exact date three weeks out in October is telling you what you want to hear.

    The day after matters too

    Curing is not “letting it dry.” Concrete gains strength by hydrating, and that needs moisture and temperature.

    Keep off it. Foot traffic after a day or so, vehicles at a week minimum, and longer if it has been cold. Keep sprinklers from blasting it. Do not park a trailer on it in week one.

    And keep deicers off it the first winter entirely. New concrete has not built its resistance yet, and salt on a first-winter slab is the fastest way to ruin a good pour.

    Frequently asked questions

    How long does prep take before a concrete pour? For a typical residential driveway or patio, plan on one to three days of prep work, plus the Dig Line locate window before any digging starts. Bigger or wetter sites take longer.

    Do I need to call 811 before a concrete pour in Idaho? Yes. Notify Dig Line at least two business days before excavation. The locate is free, and it covers utility-owned lines only — private lines you or a previous owner installed are not marked, so mark those yourself.

    How thick should the gravel base be under a concrete slab? Four inches of compacted gravel minimum, placed and compacted in lifts. Soft or wet soils need more.

    Can you pour concrete over grass or topsoil? No. Organics have to be stripped out. They decompose and compress, and the slab settles into the void.

    How long before I can drive on new concrete? A week is the working minimum for a passenger vehicle, longer in cold weather. Heavy trucks and trailers should wait longer than that.

    Want a straight answer on your site?

    Send photos of the area, rough dimensions, and what you want to put on it, and I will tell you what the prep actually involves there — including if the honest answer is that drainage has to get fixed first.

    Need concrete work in Eastern Idaho? Call Zach at Skinner Customs at (208) 390-5794 or start at skinner-customs.com.


    Content produced in partnership with S4 Media, marketing partner of SwagerBuilds LLC.